TVU Go · Getting Started Guide
Get started with TVU Go
Everything you need to go live from your phone: streams, platforms, overlays, cameras, and more.
Opening the App
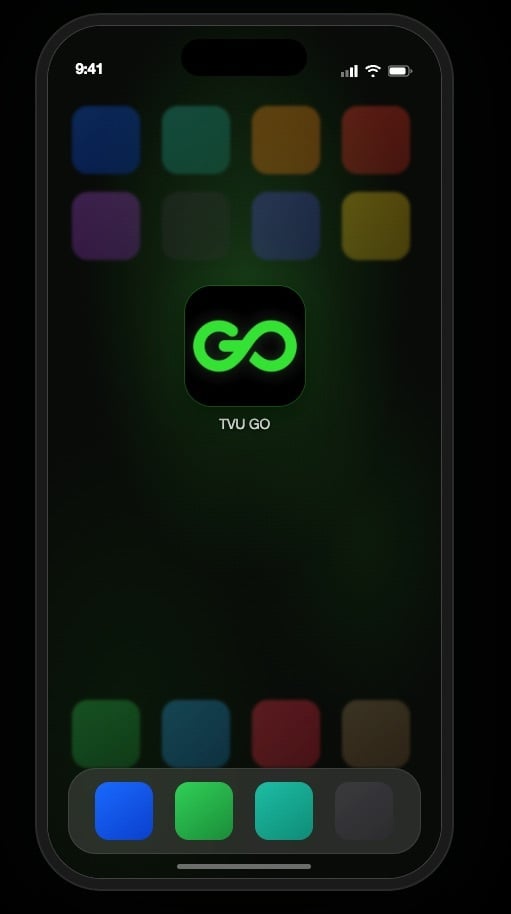
Open TVU Go App
Find the TVU Go icon on your home screen and tap it to launch the app.
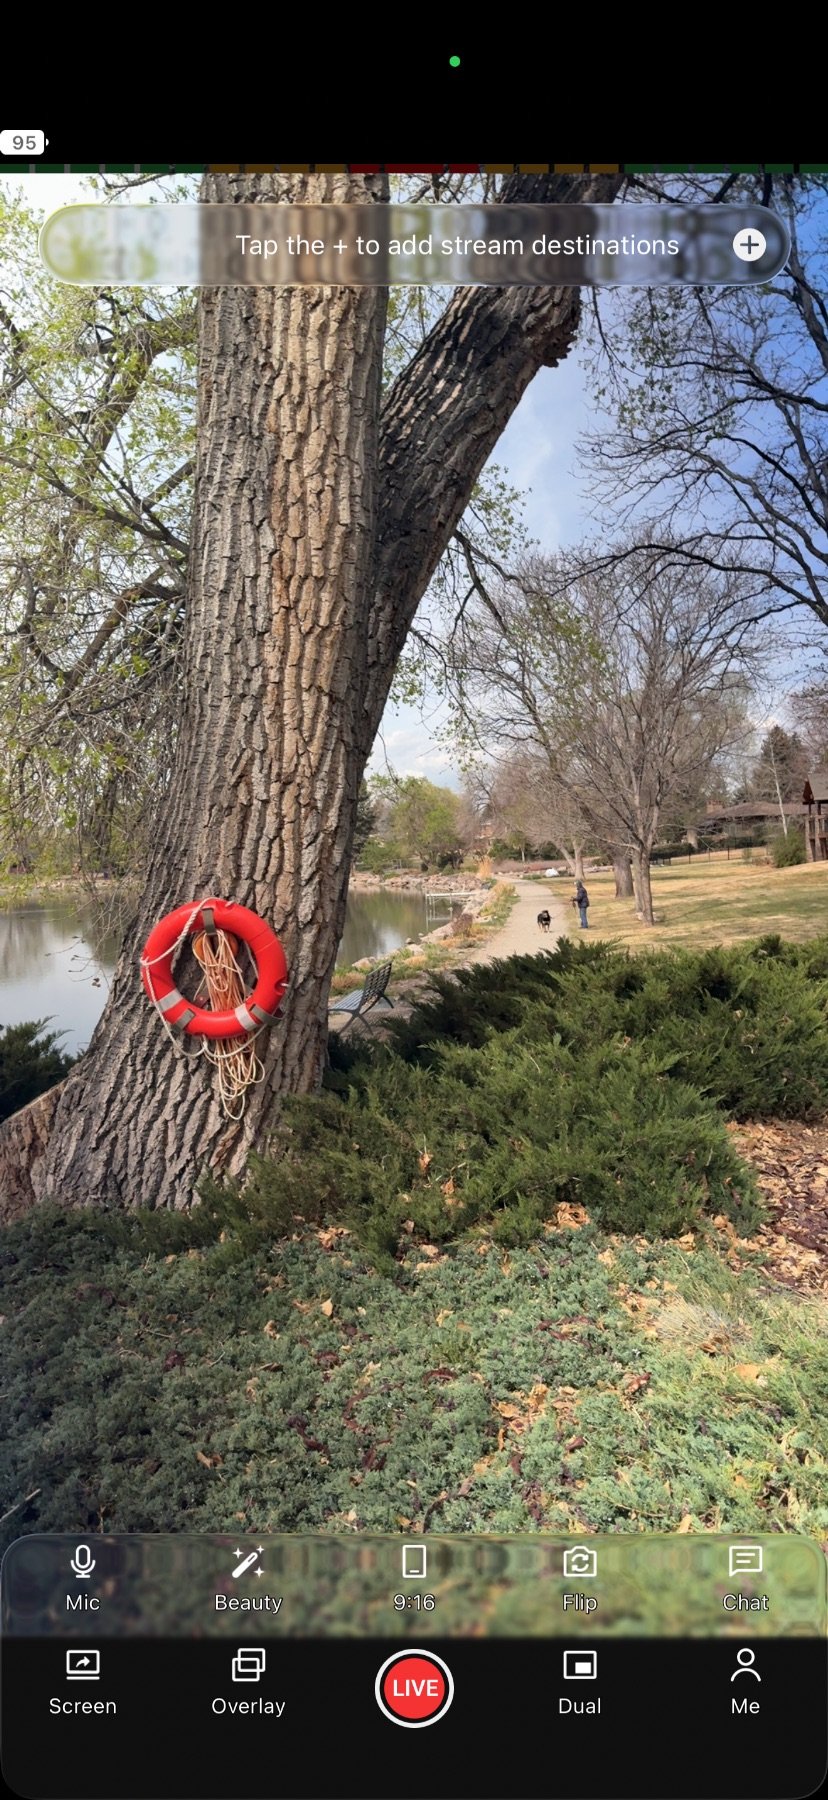
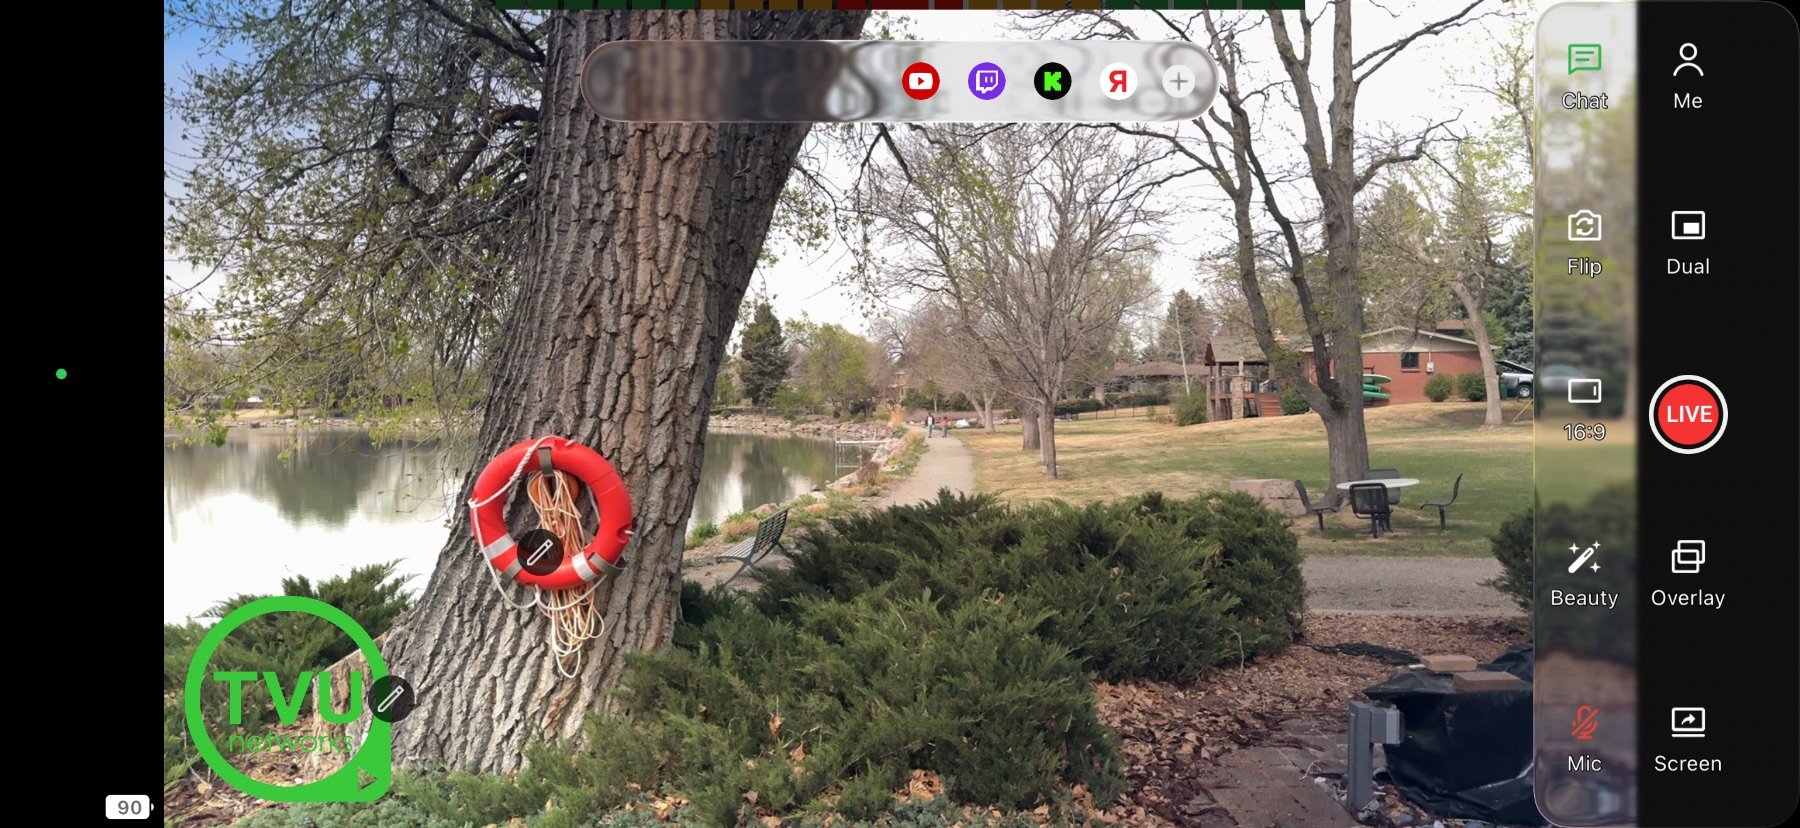
Opening Screen
The TVU Go home screen loads with your live camera preview and streaming controls ready.

Change Orientation
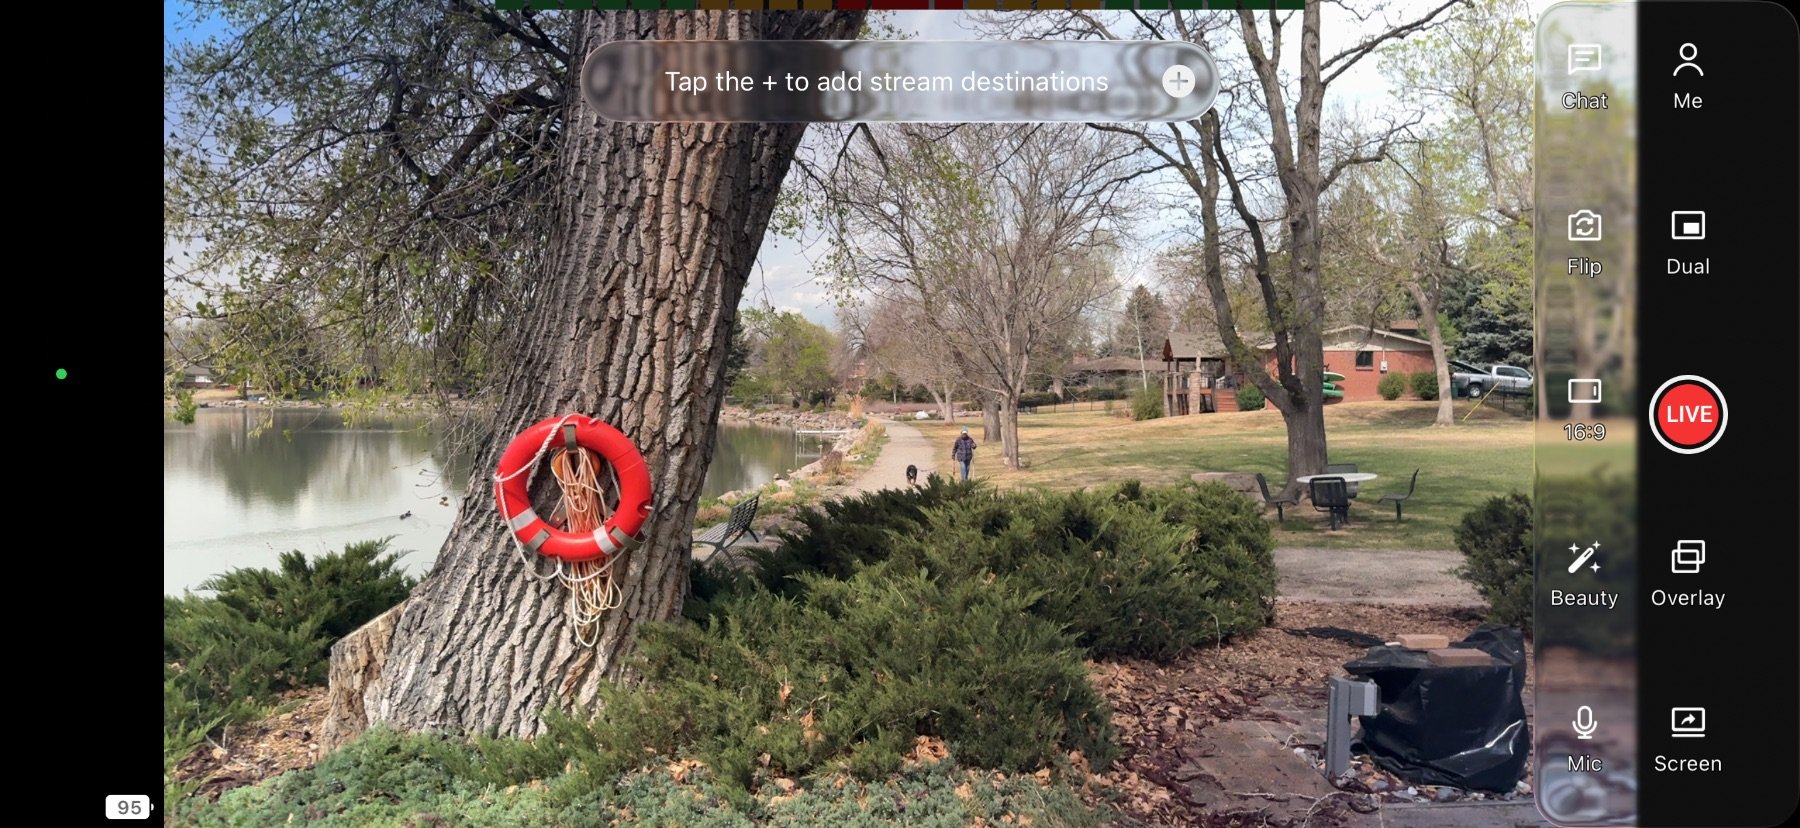
Tap the 16:9 ratio button to toggle between horizontal and vertical stream orientation.
Vertical View
Portrait mode is now active, ideal for TikTok, Instagram Reels, and other vertical-first platforms.
Get & Manage your Subscription
Choose your plan and manage your subscription.
Open Settings
Tap "Me" in the bottom menu to access your account settings, subscription, and advanced options.
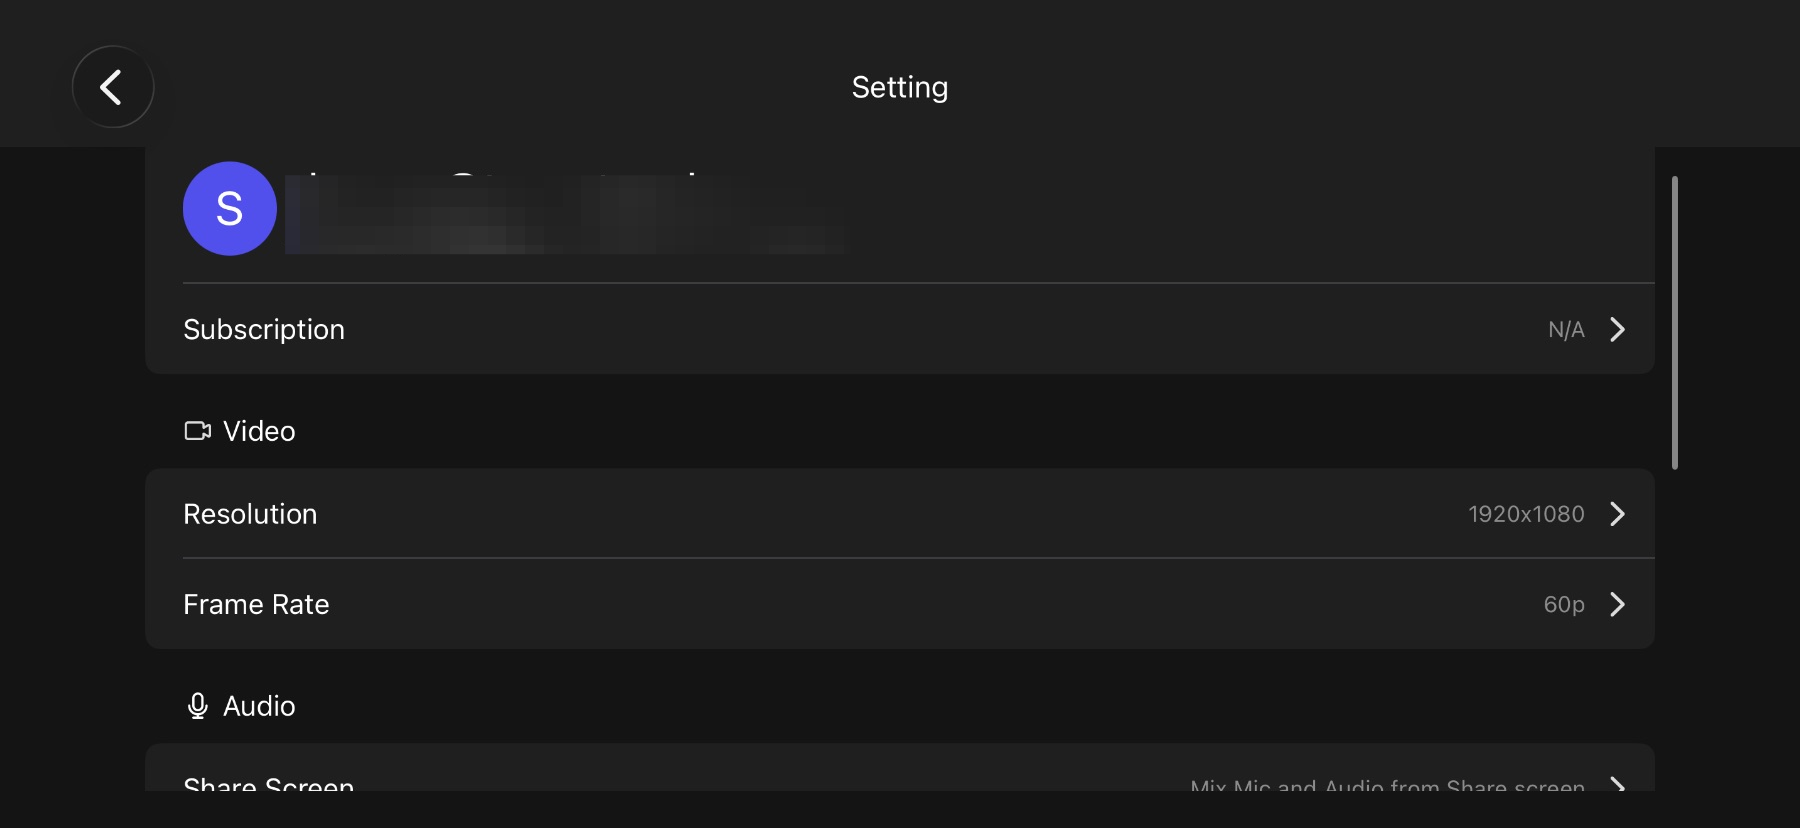
Subscription Row
Select "Subscription" to view your current plan and access billing management.
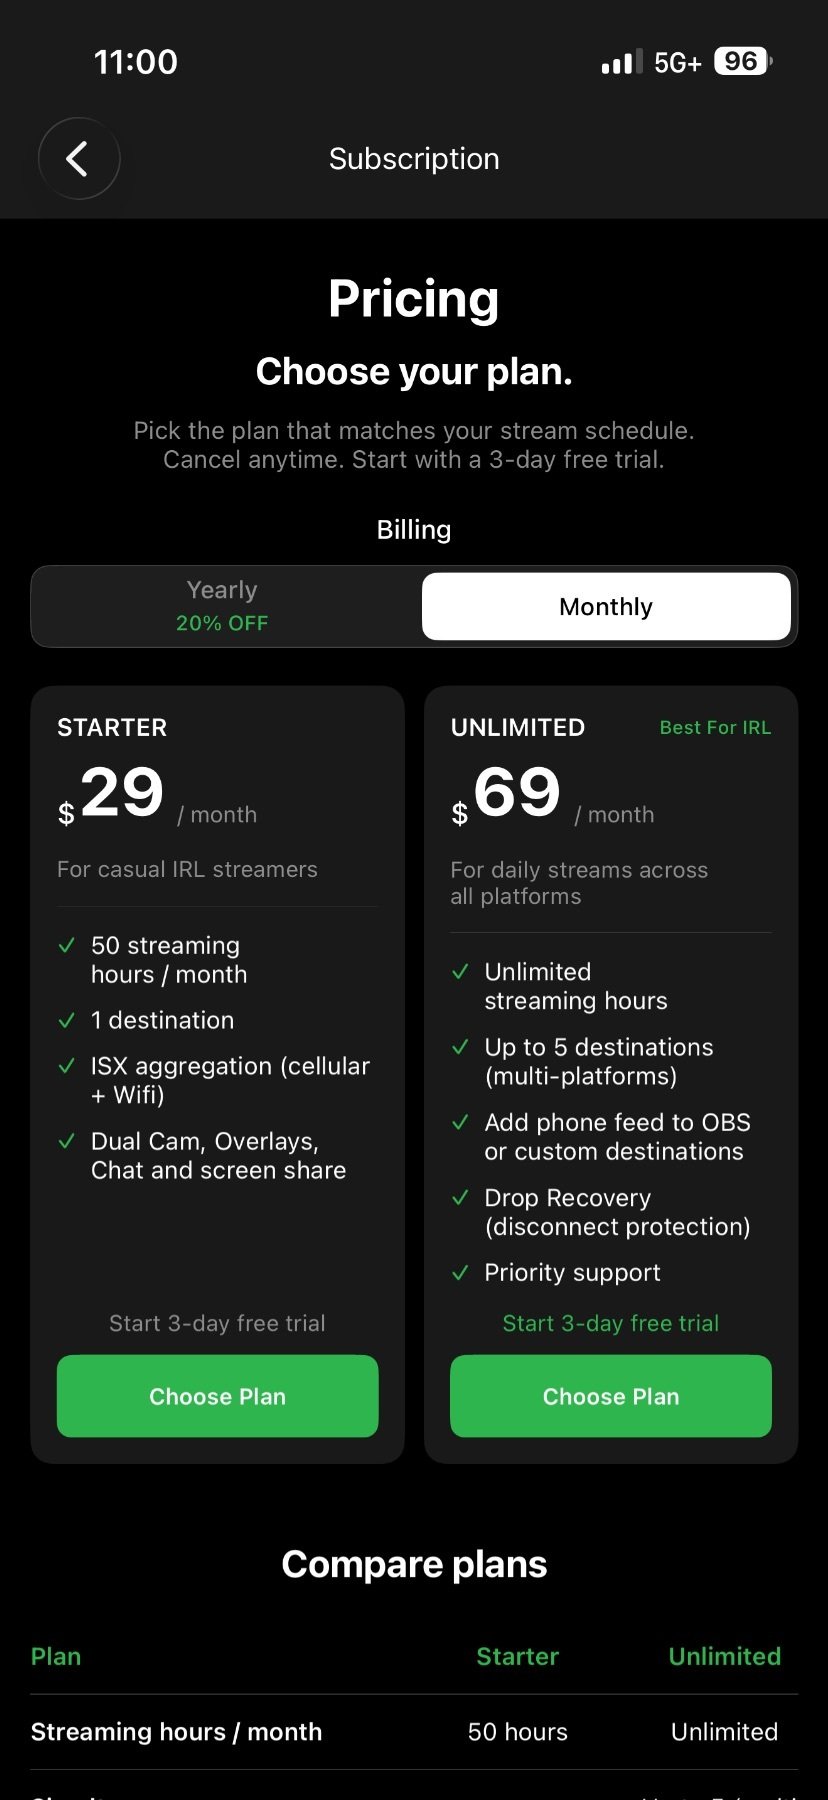
Subscription Portal
Select "Learn more" to open the subscription management portal. There, you can select your plan and purchase your subscription.
Stream Settings · Orientation
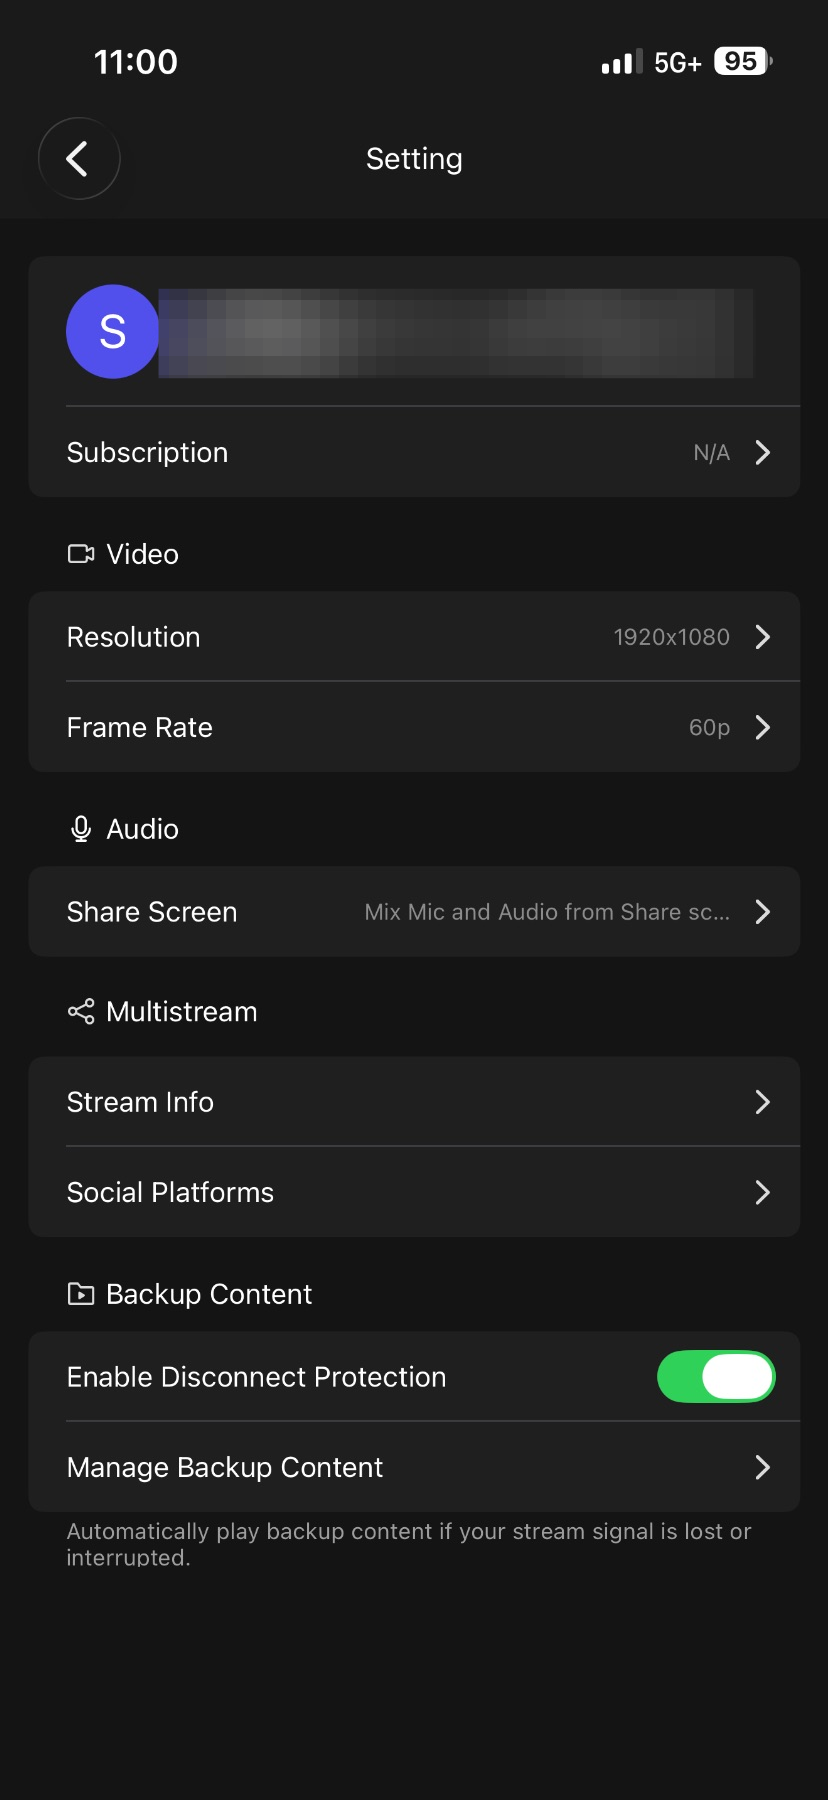
Set your resolution, frame rate, and stream orientation.

Resolution & Frame Rate
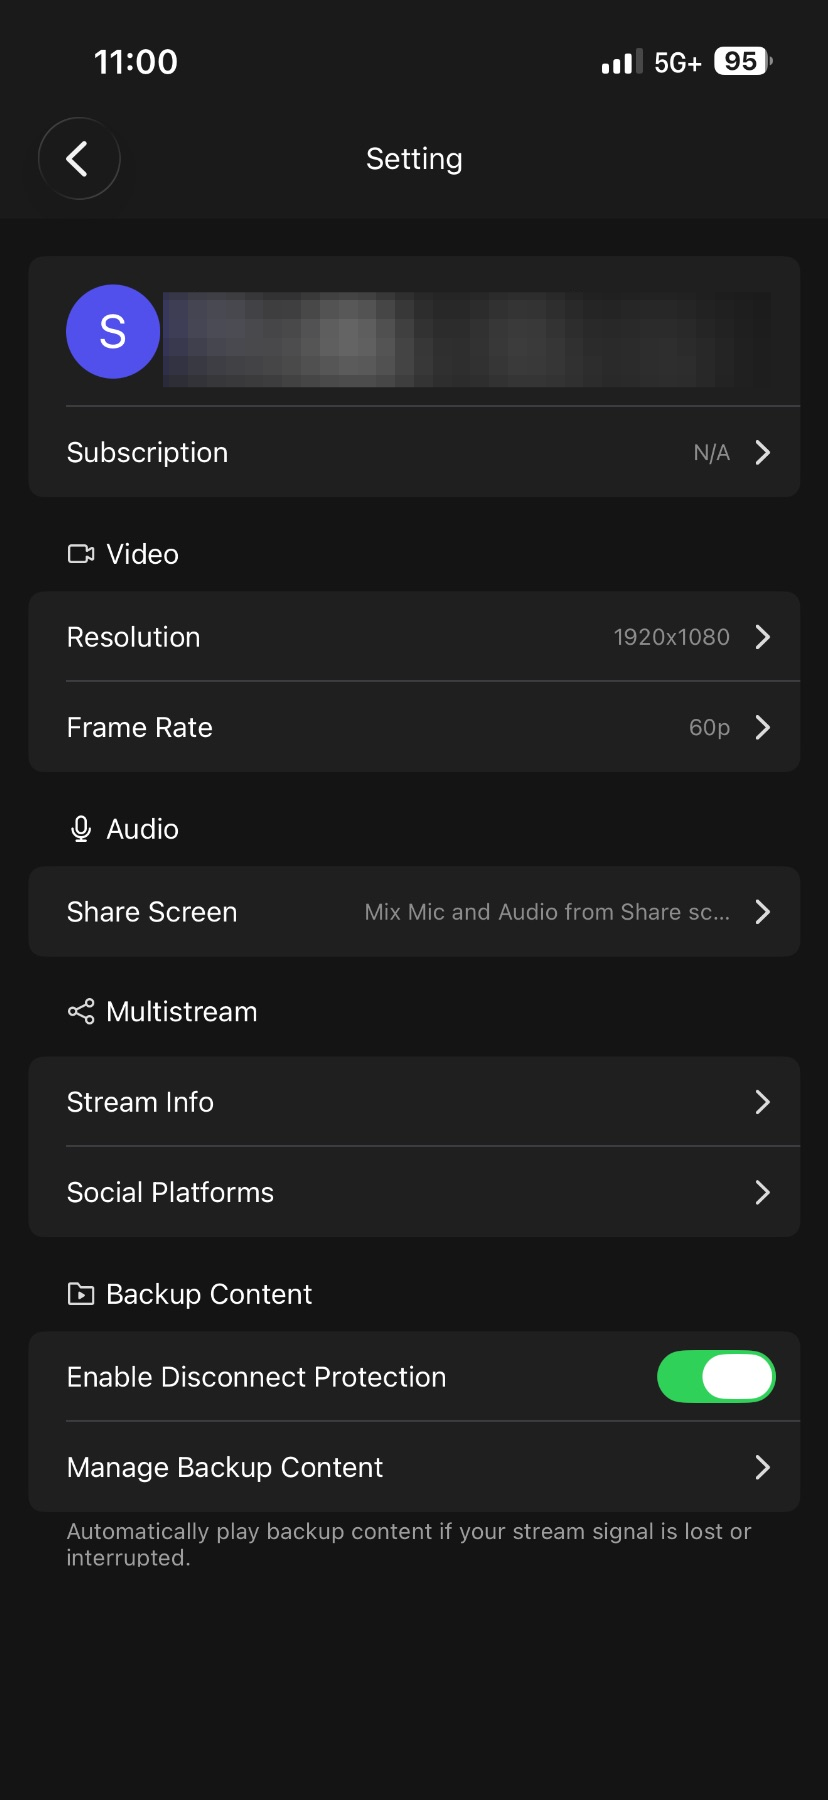
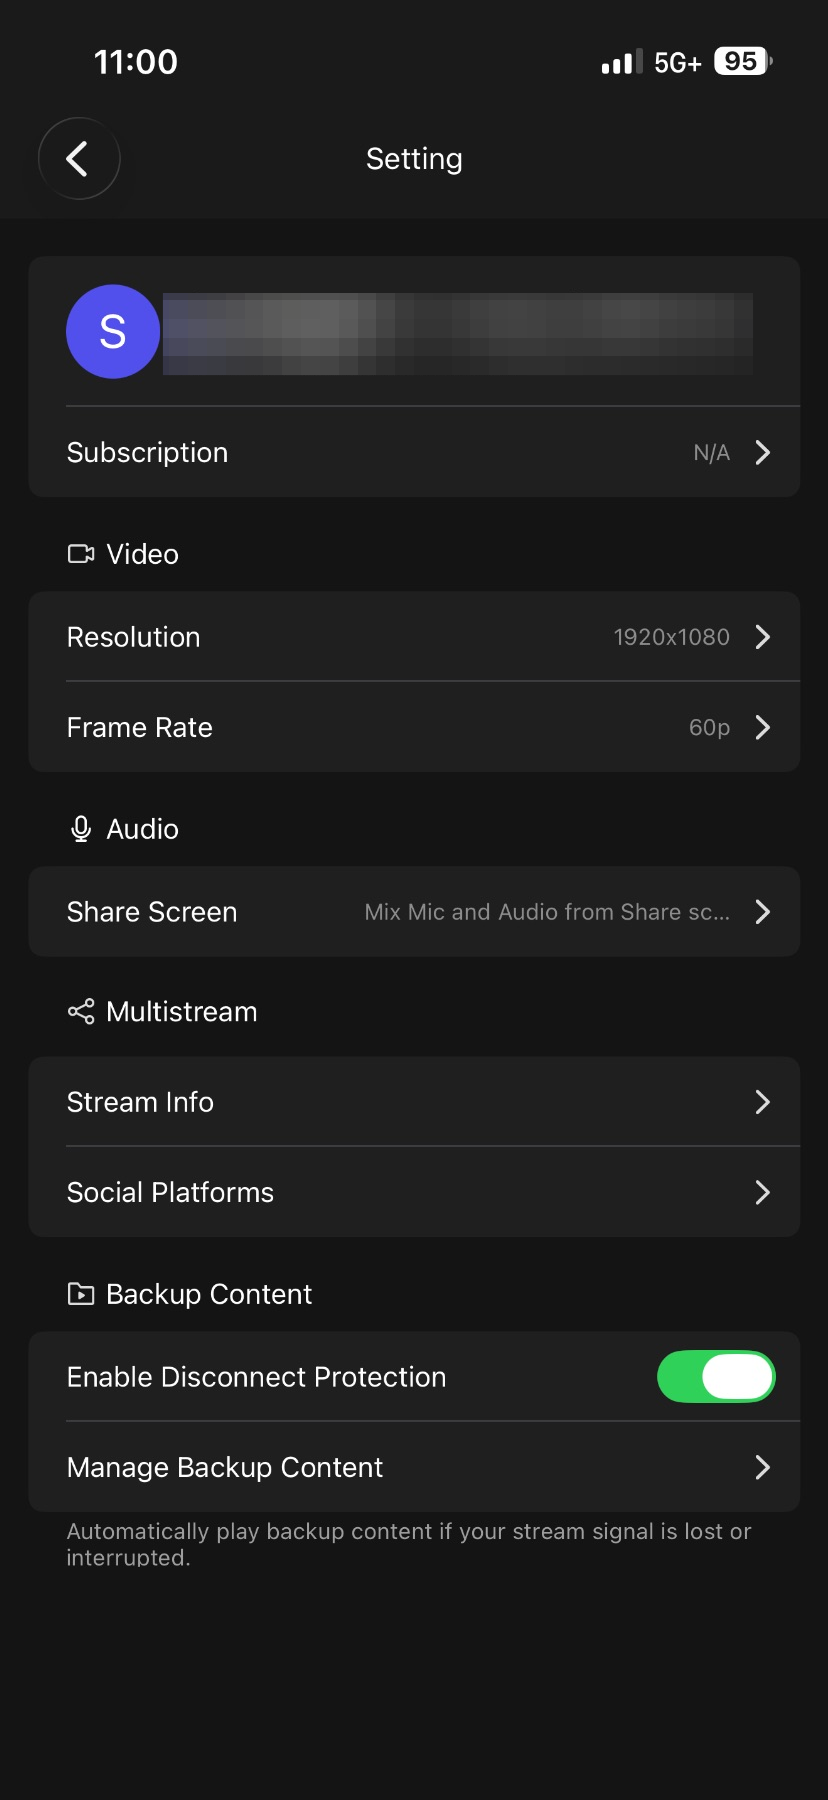
Tap "Me" in the bottom menu to access your video settings, including resolution and frame rate.
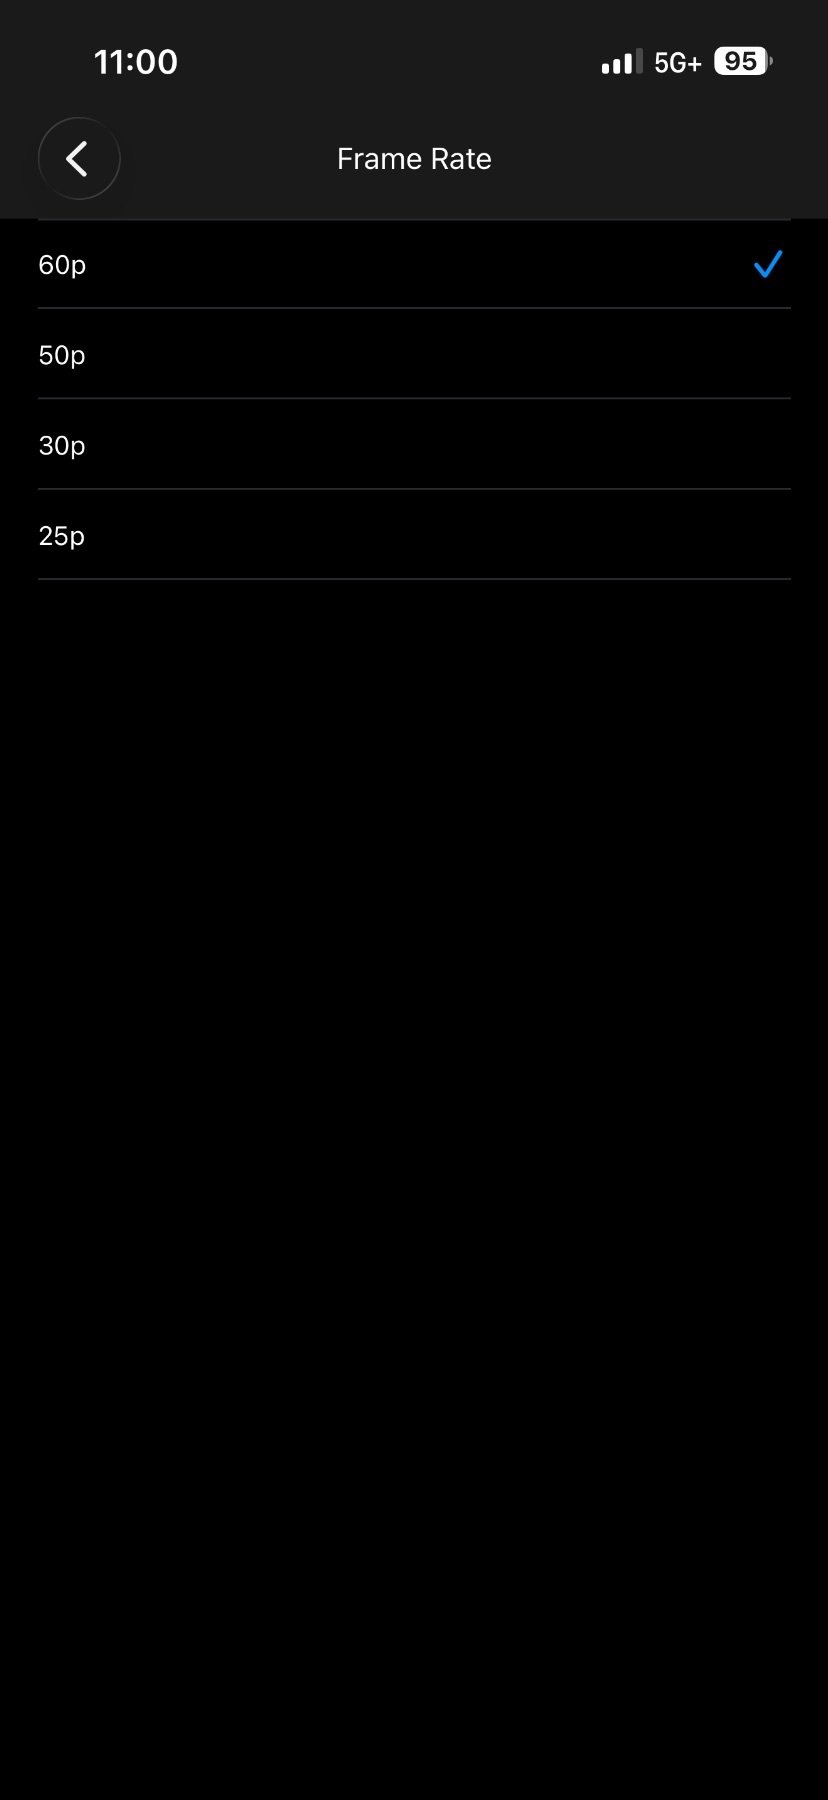
Select Your Settings
Choose your preferred resolution and frame rate from the options.
Stream Settings · Audio
Choose how your audio is mixed for the broadcast.
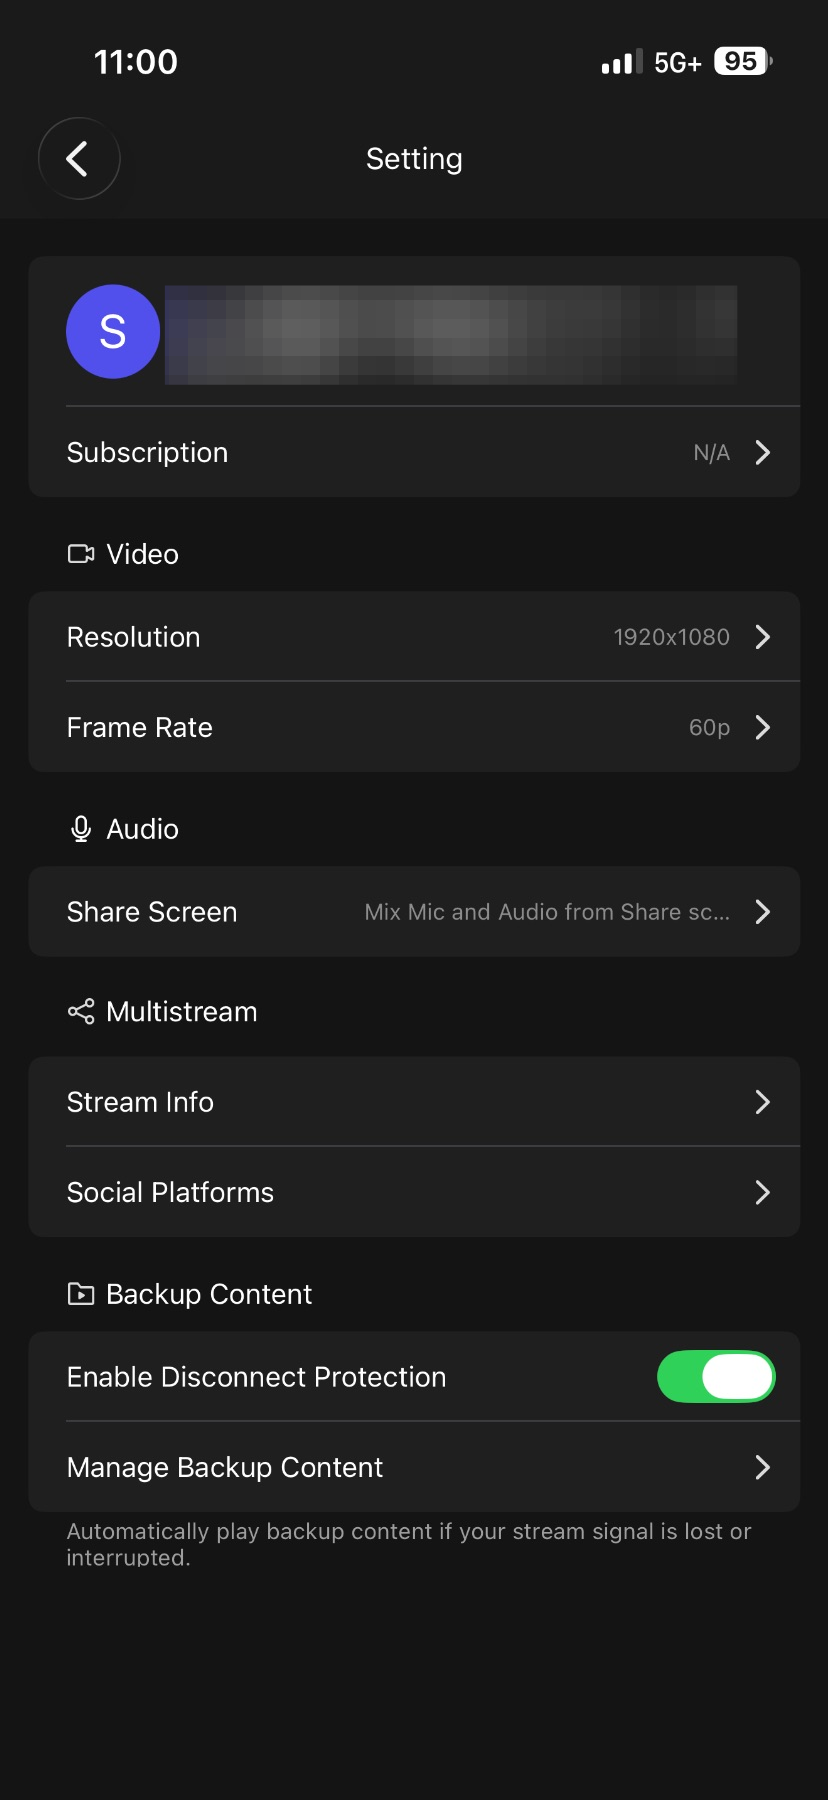
Screen Share Audio
Tap "Audio" > "Share Screen" to configure how audio works during screen sharing.
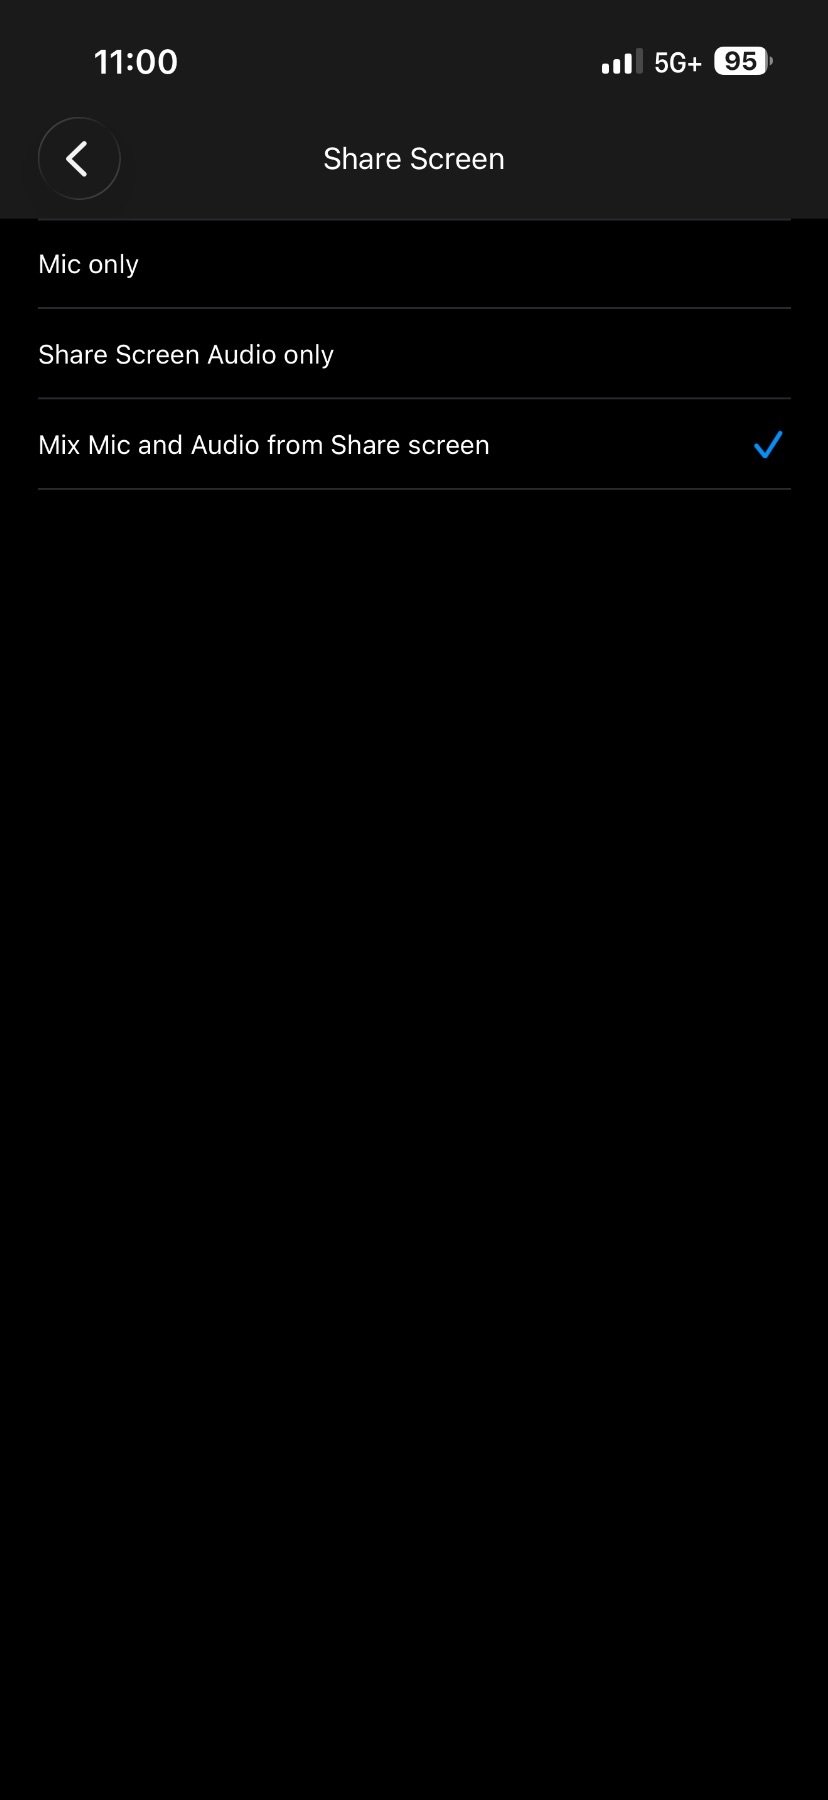
Choose Audio Mix
Use screen audio only, or mix it with your mic. Your voice comes through clearly while device audio is reduced.
Stream Settings · Stream Info
Add the title and description your stream shows everywhere.
Stream Title & Description
In the settings menu, select "Stream info" to set your stream title and description.
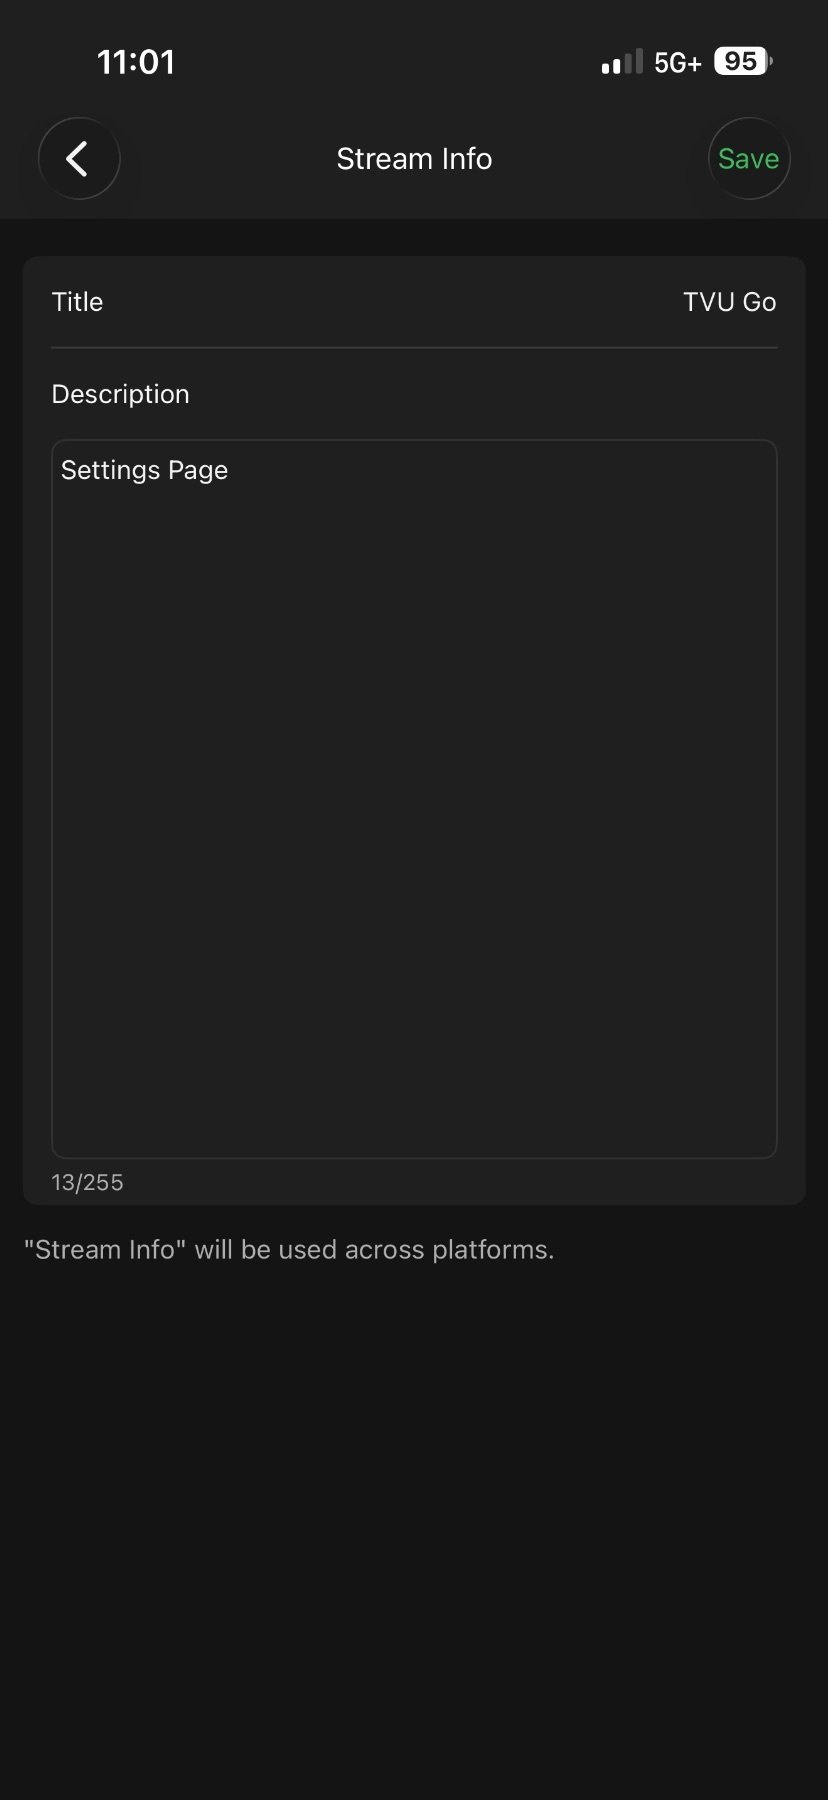
Enter Title
Type your stream title and description here.
Platforms & Destinations
Connect the platforms you want to stream to.
Connect Platforms
To connect and manage your streaming destinations: tap the '+' (plus) icon on the app's main screen, or open the settings menu by tapping 'Me' in the bottom or side menu, then select 'Social platforms'
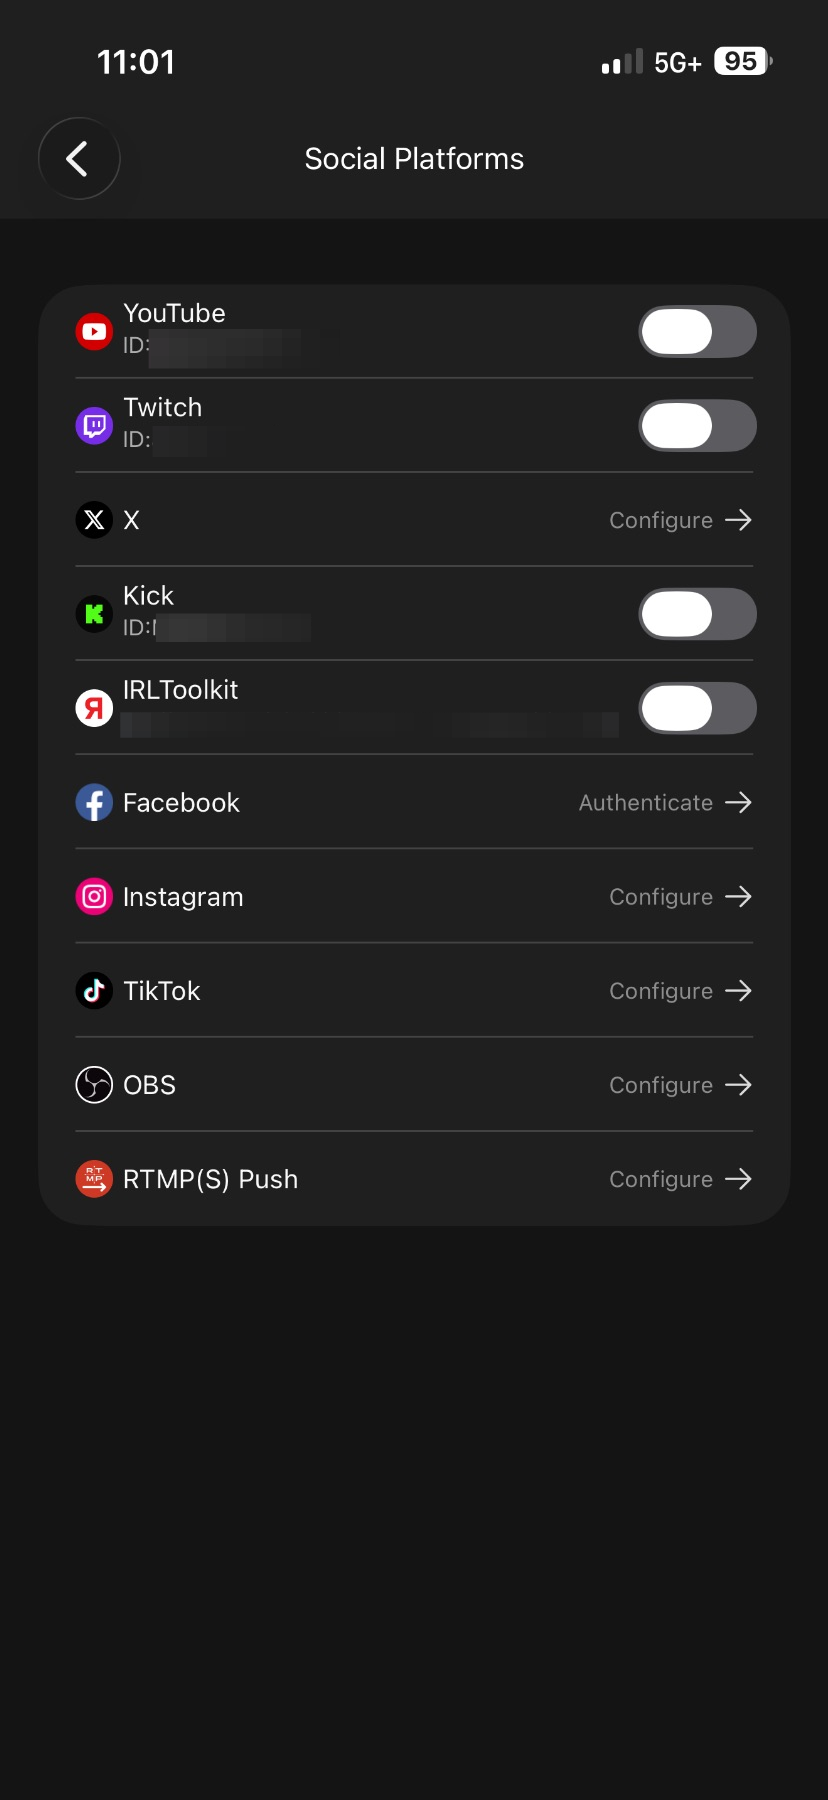
Select a Platform
Tap a platform to connect it. Supported destinations include YouTube, Twitch, Facebook, and more.
Stream to OBS
See our guide to stream live from your phone to OBS on your computer: add graphics, switch scenes, and go live to YouTube, Twitch, or any platform you want.
Go to the OBS guideDisconnect Protection
Keep your stream up if your connection drops.
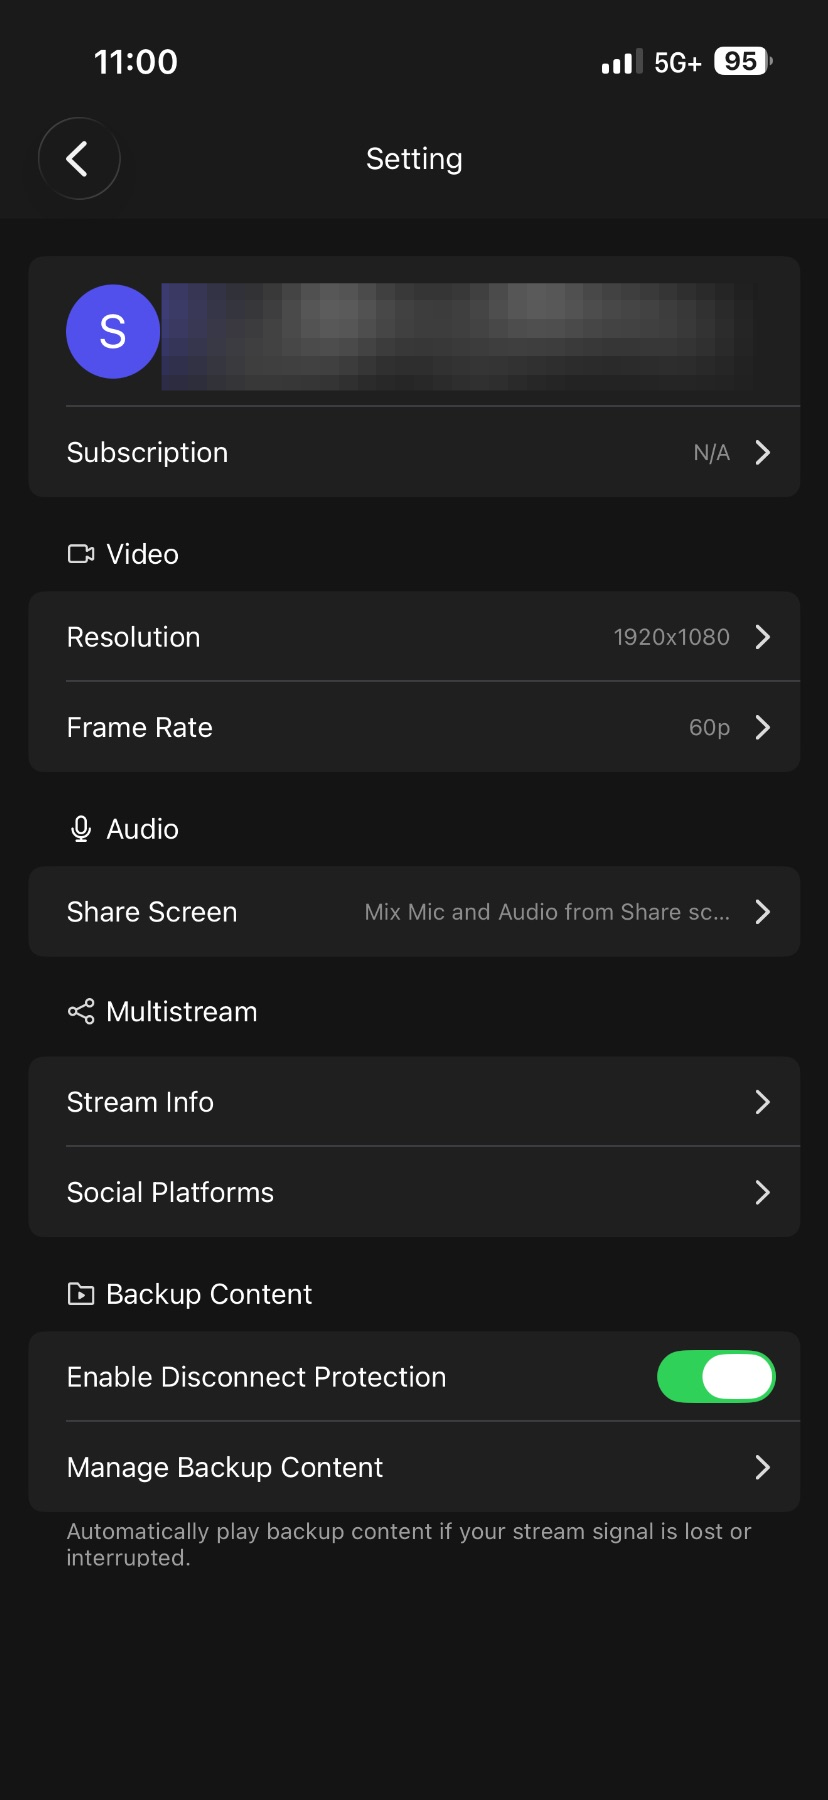
Disconnect Protection
In the Settings menu, enable Disconnect Protection, then select Manage Backup Content to configure your backup clip. Upload a backup clip, and TVU Go will automatically switch to it if your connection drops, then return to your live stream once the connection is stable.
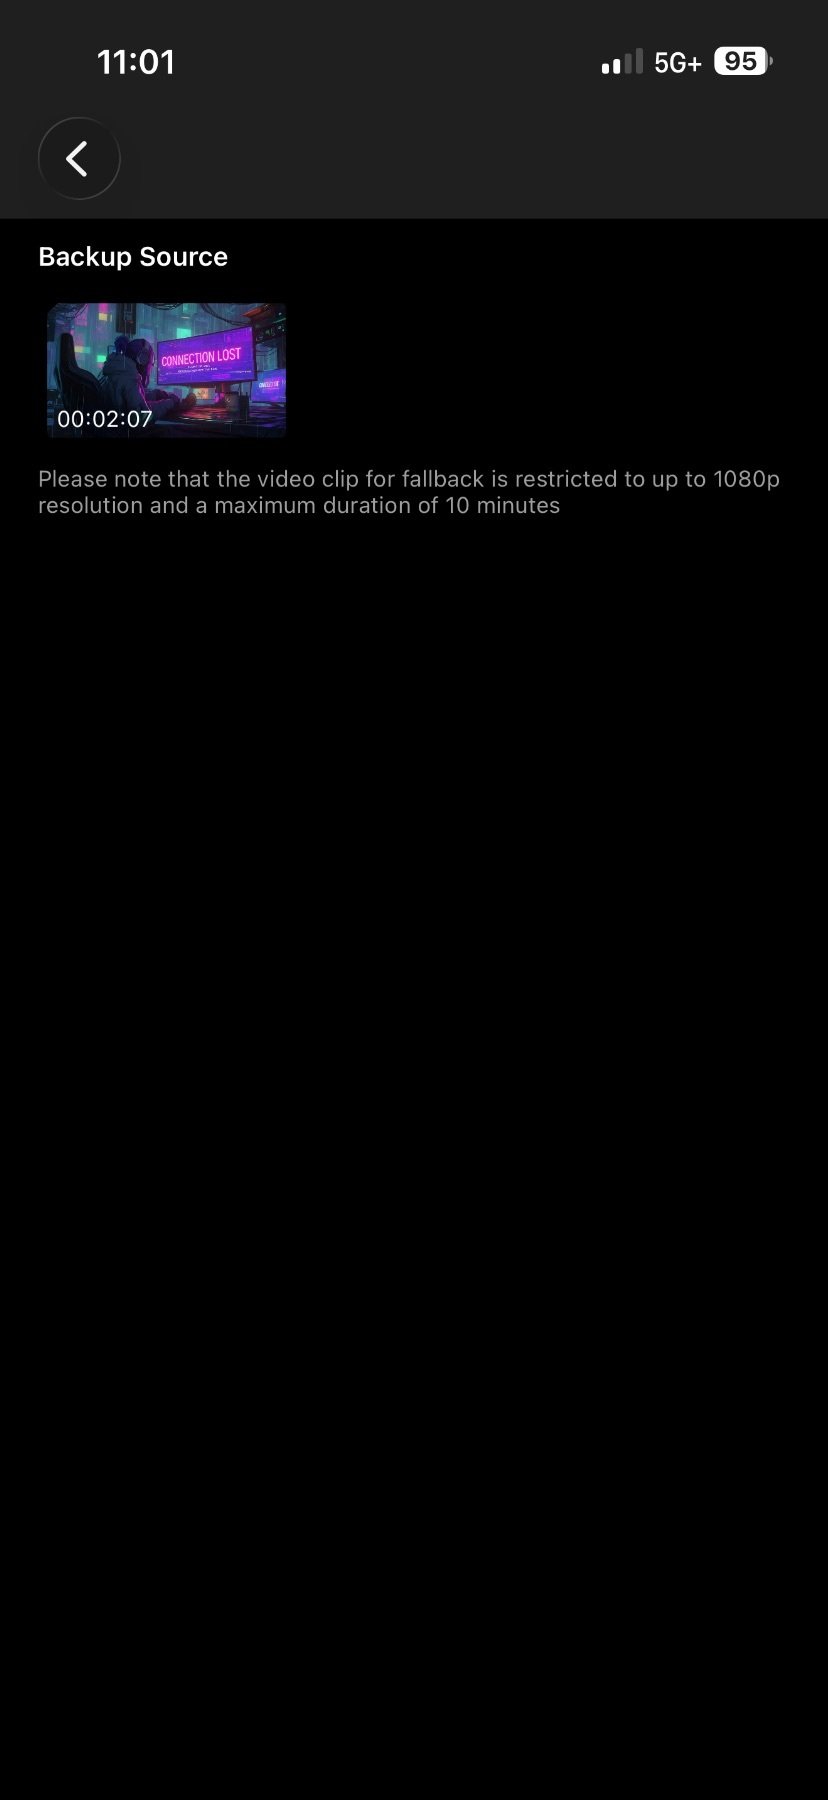
Set Up Backup Clip
Upload your backup clip. This clip will play if your connection drops, keeping your stream active.
Going LIVE
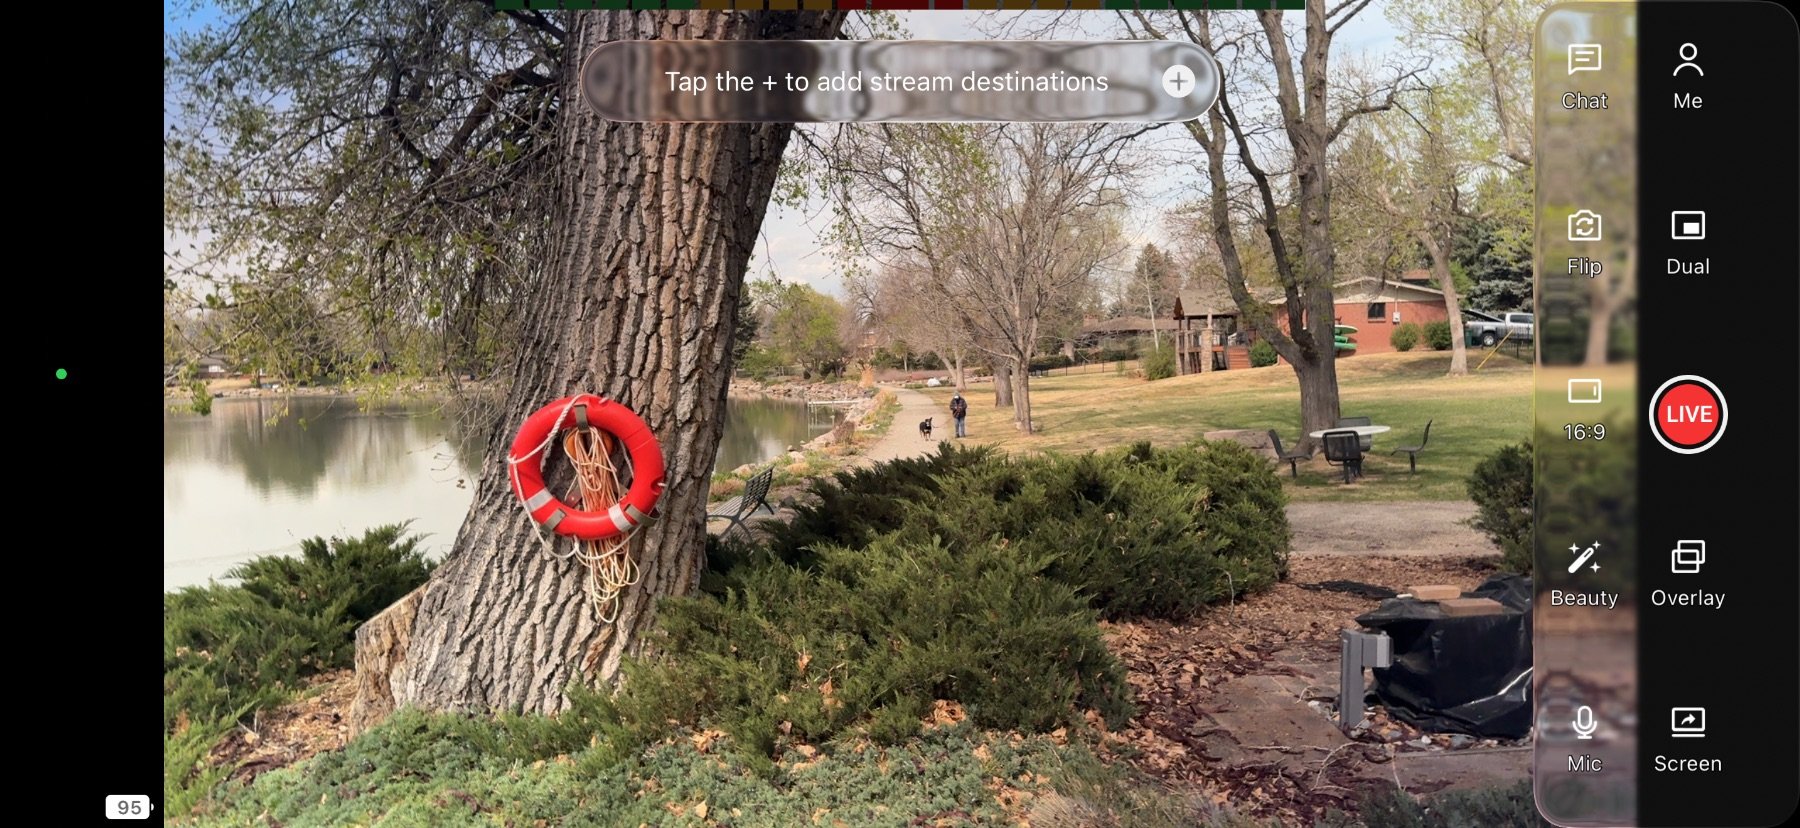
Select your platforms
Tap the "+" (plus icon) on the home screen to enable the destinations you want to stream to.
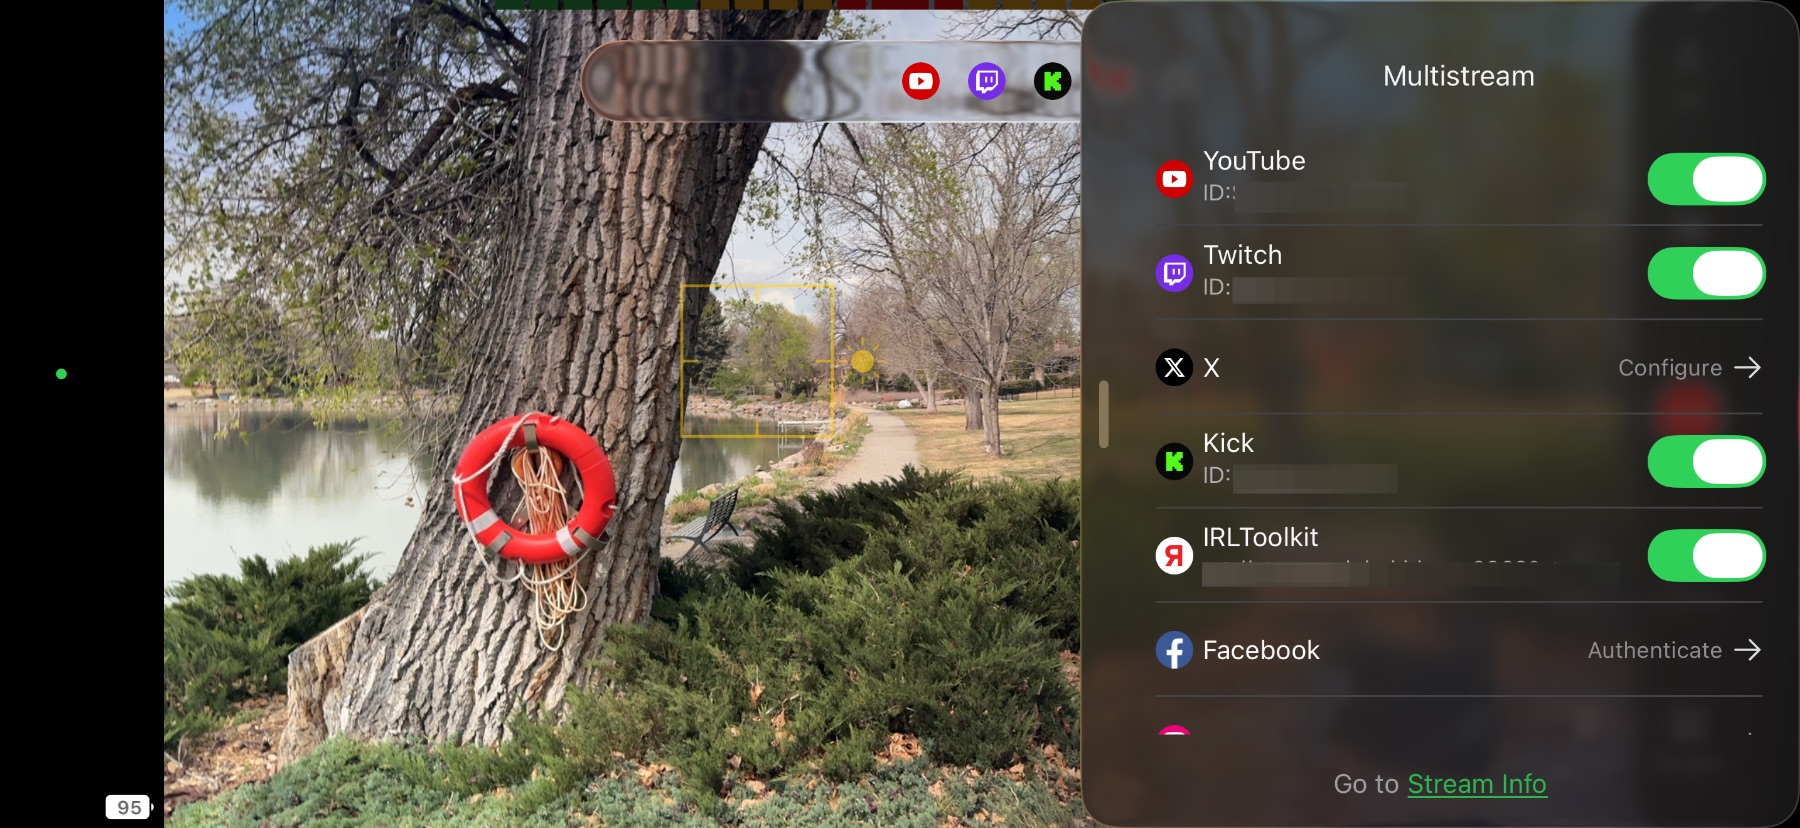
Toggle Platform On
Tap the toggles to enable or disable the platforms you want to stream to. Unlimited users can stream to multiple destinations at the same time (up to 5).
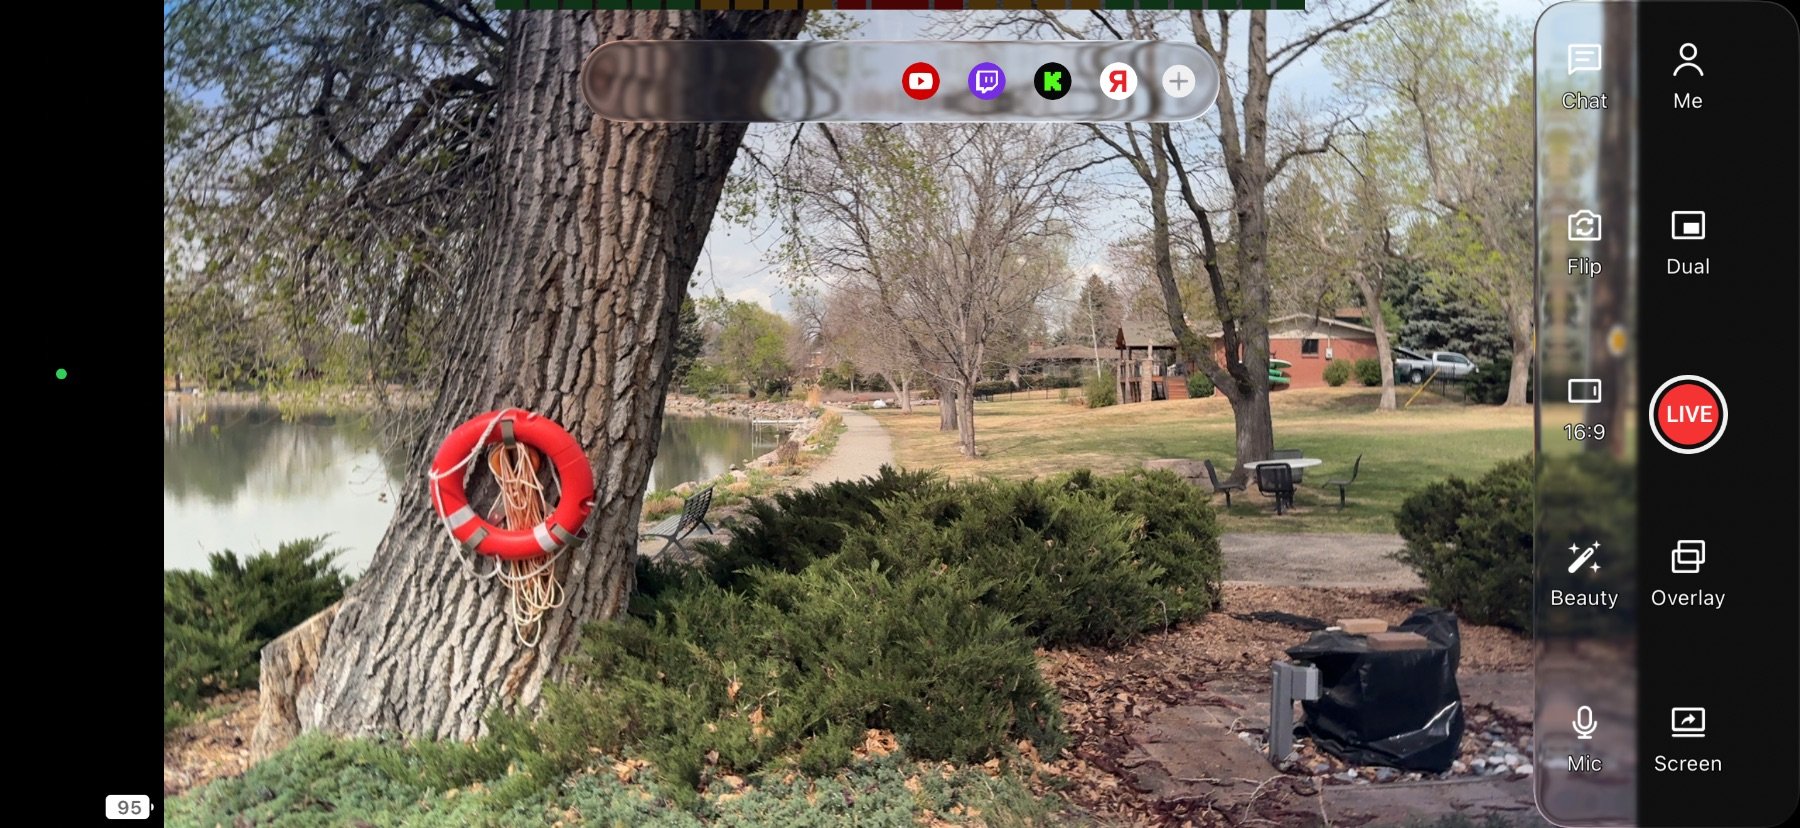
Go LIVE
Press the LIVE button; TVU Go connects and begins distributing your stream to all enabled platforms simultaneously.
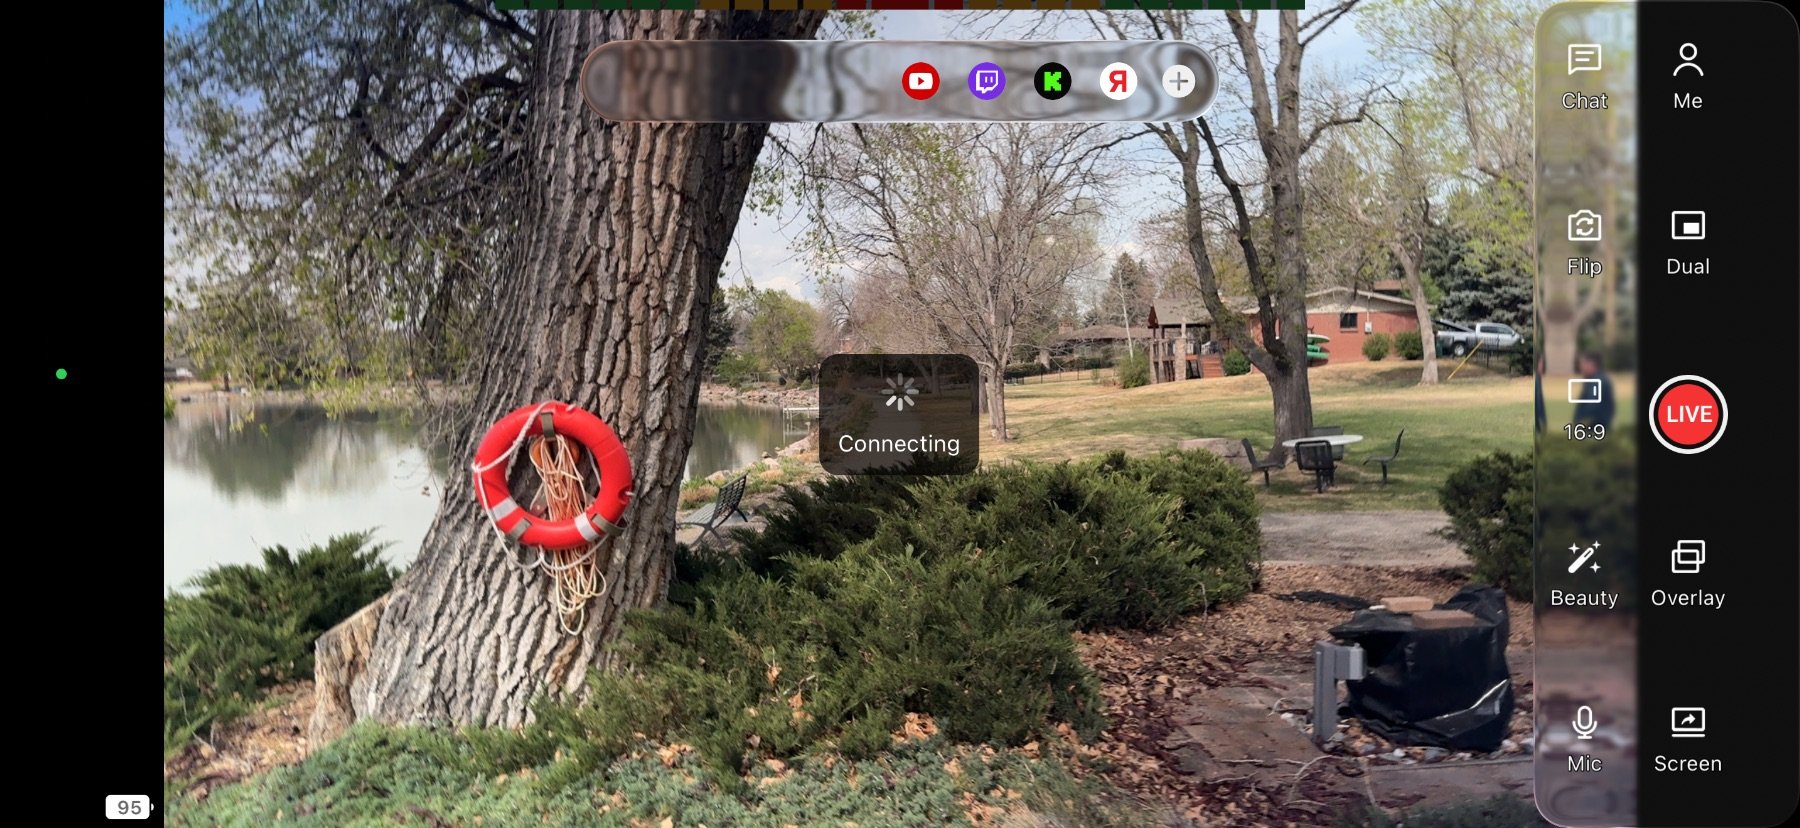
Preparing Stream
A "Connecting" message will appear. TVU Go is preparing and optimizing your stream before it goes live across all platforms.
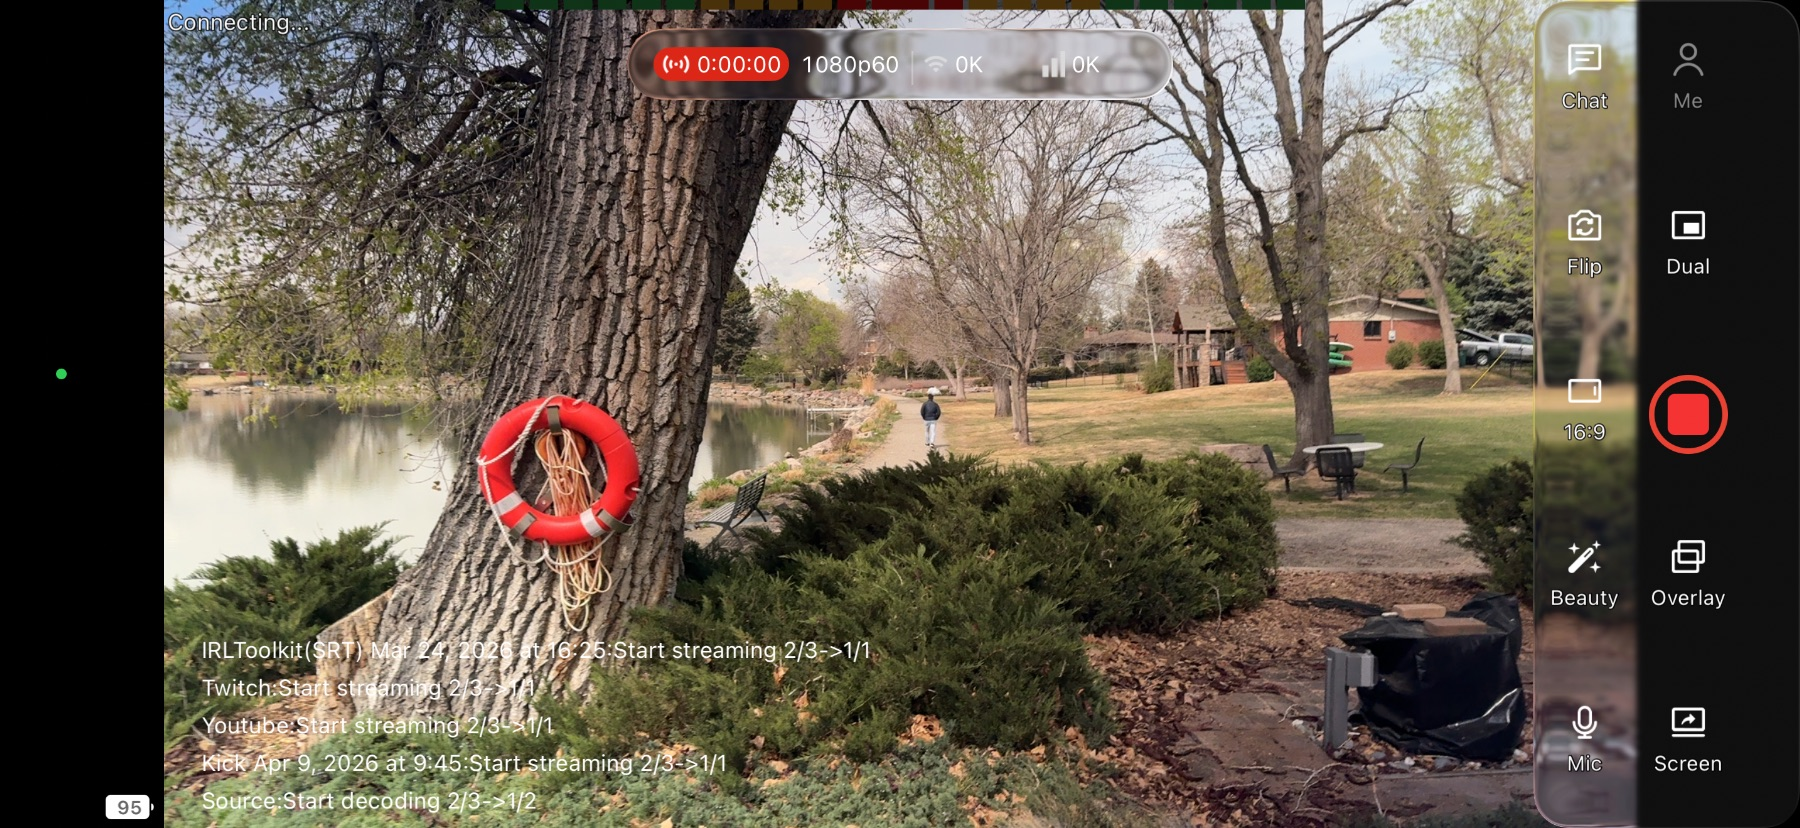
Stream Active
TVU Go is now sending your stream to all active destinations.
Optimizing Connections · Dual Connection
Combine two networks at once for a more stable stream.
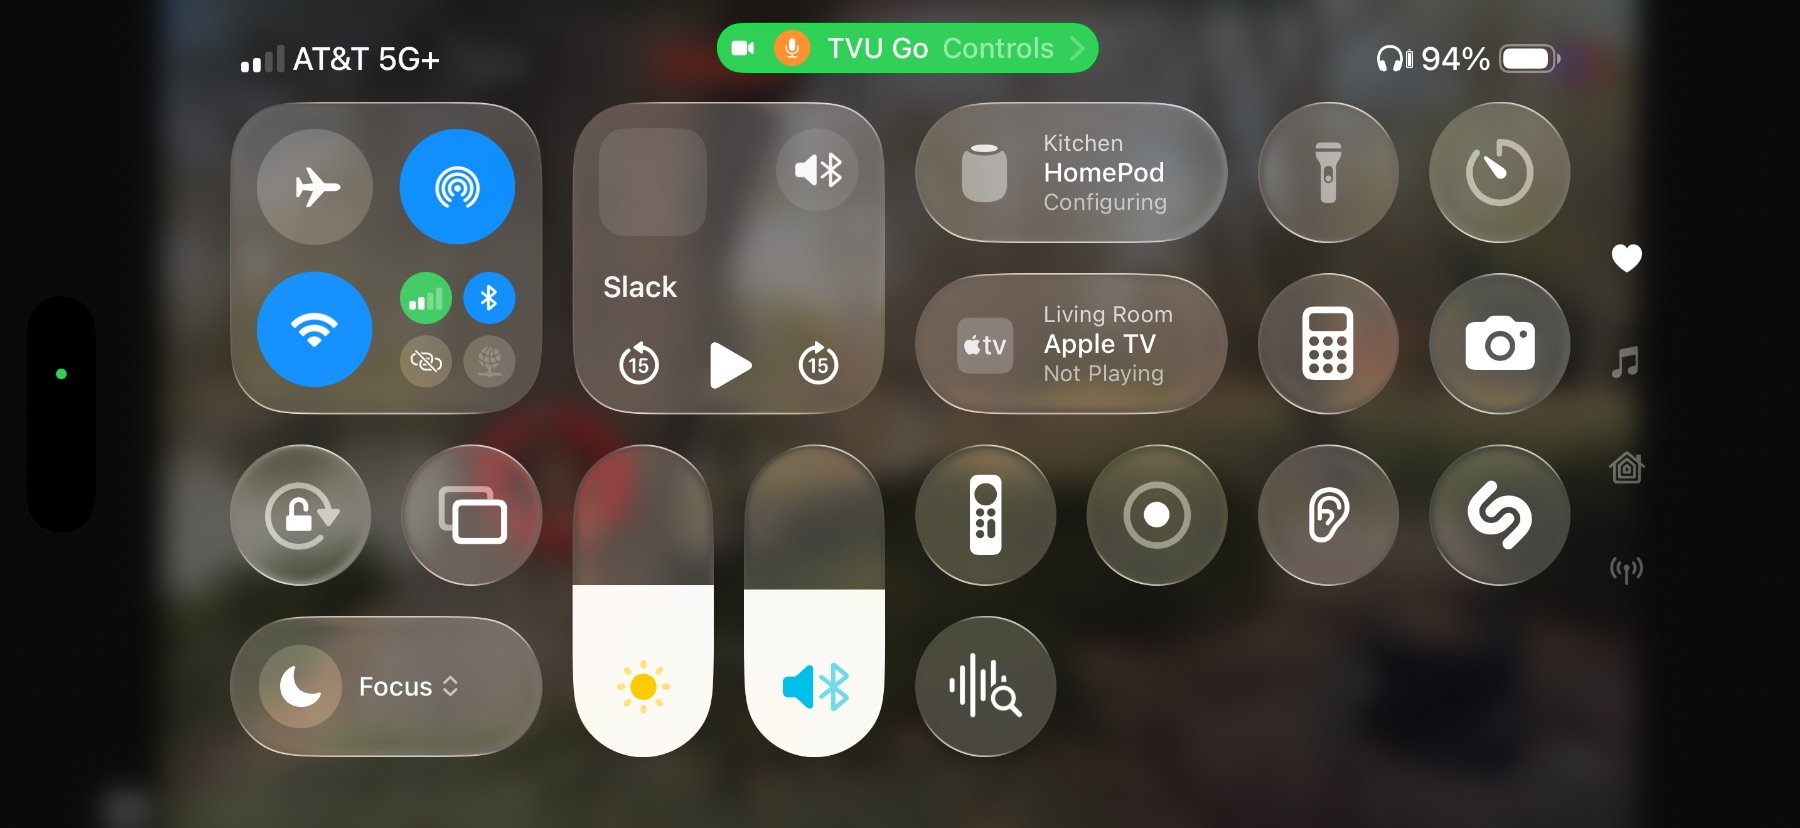
Enable Dual Connection
Swipe down to open Control Center, then tap "TVU Go Controls" and turn on Dual Connection. This allows your phone to use multiple networks at the same time for a more stable and reliable stream.
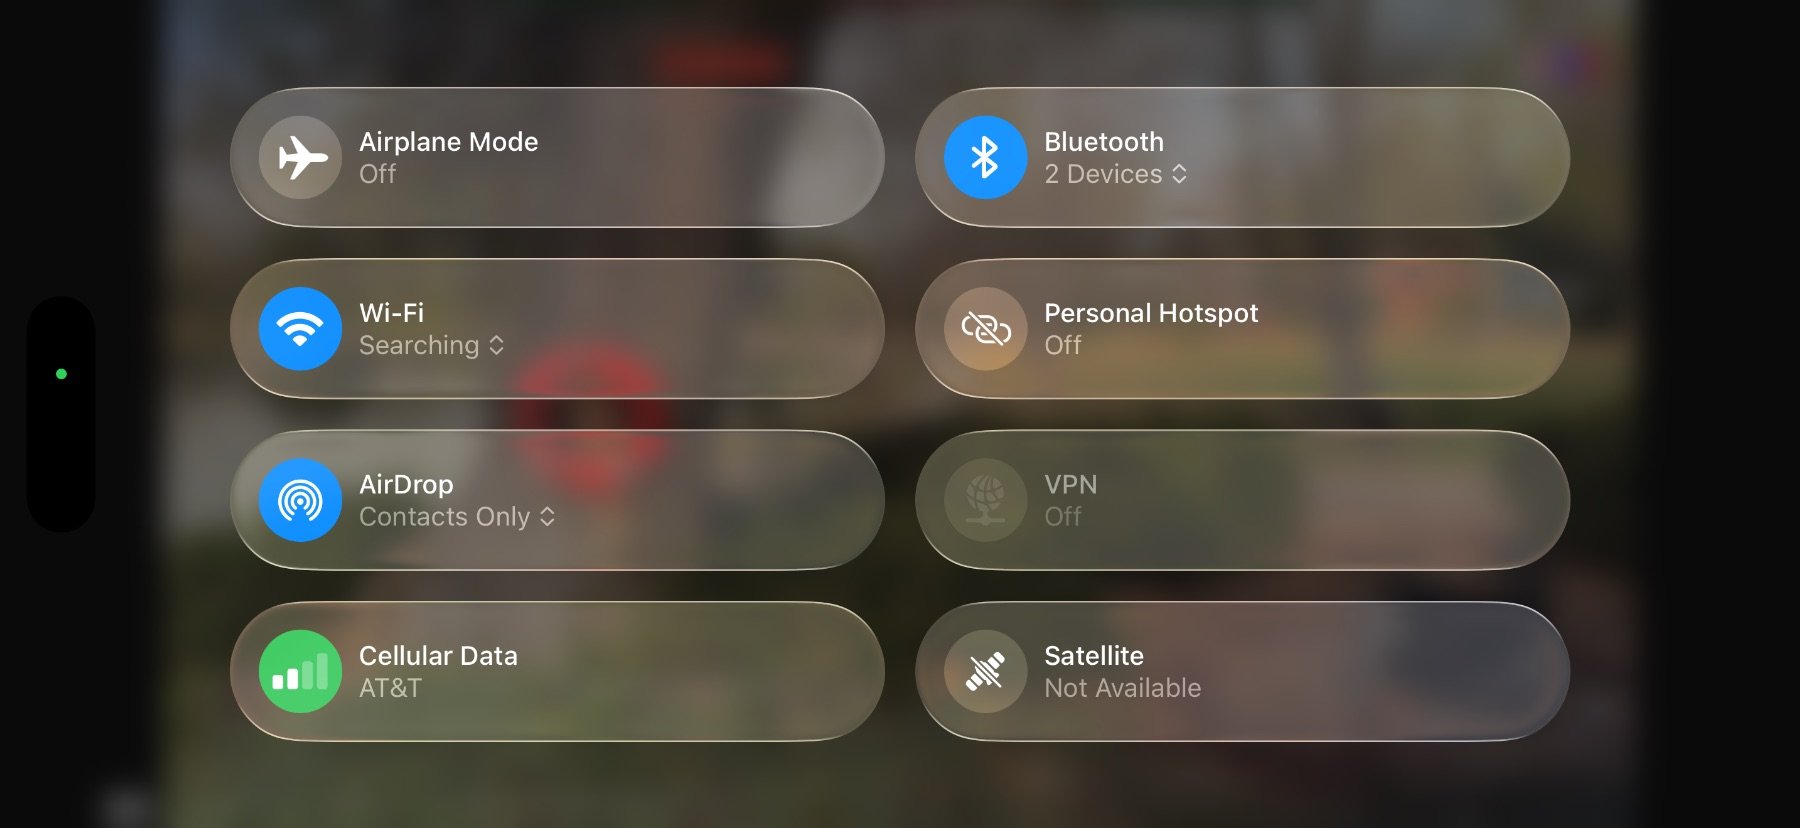
Add Second Network
Make sure your phone is connected to both Wi-Fi and cellular data. TVU Go will automatically combine these connections when Dual Connection is enabled.
Optimizing Connections · Live Bitrate
Watch your bitrate and connection in real time.
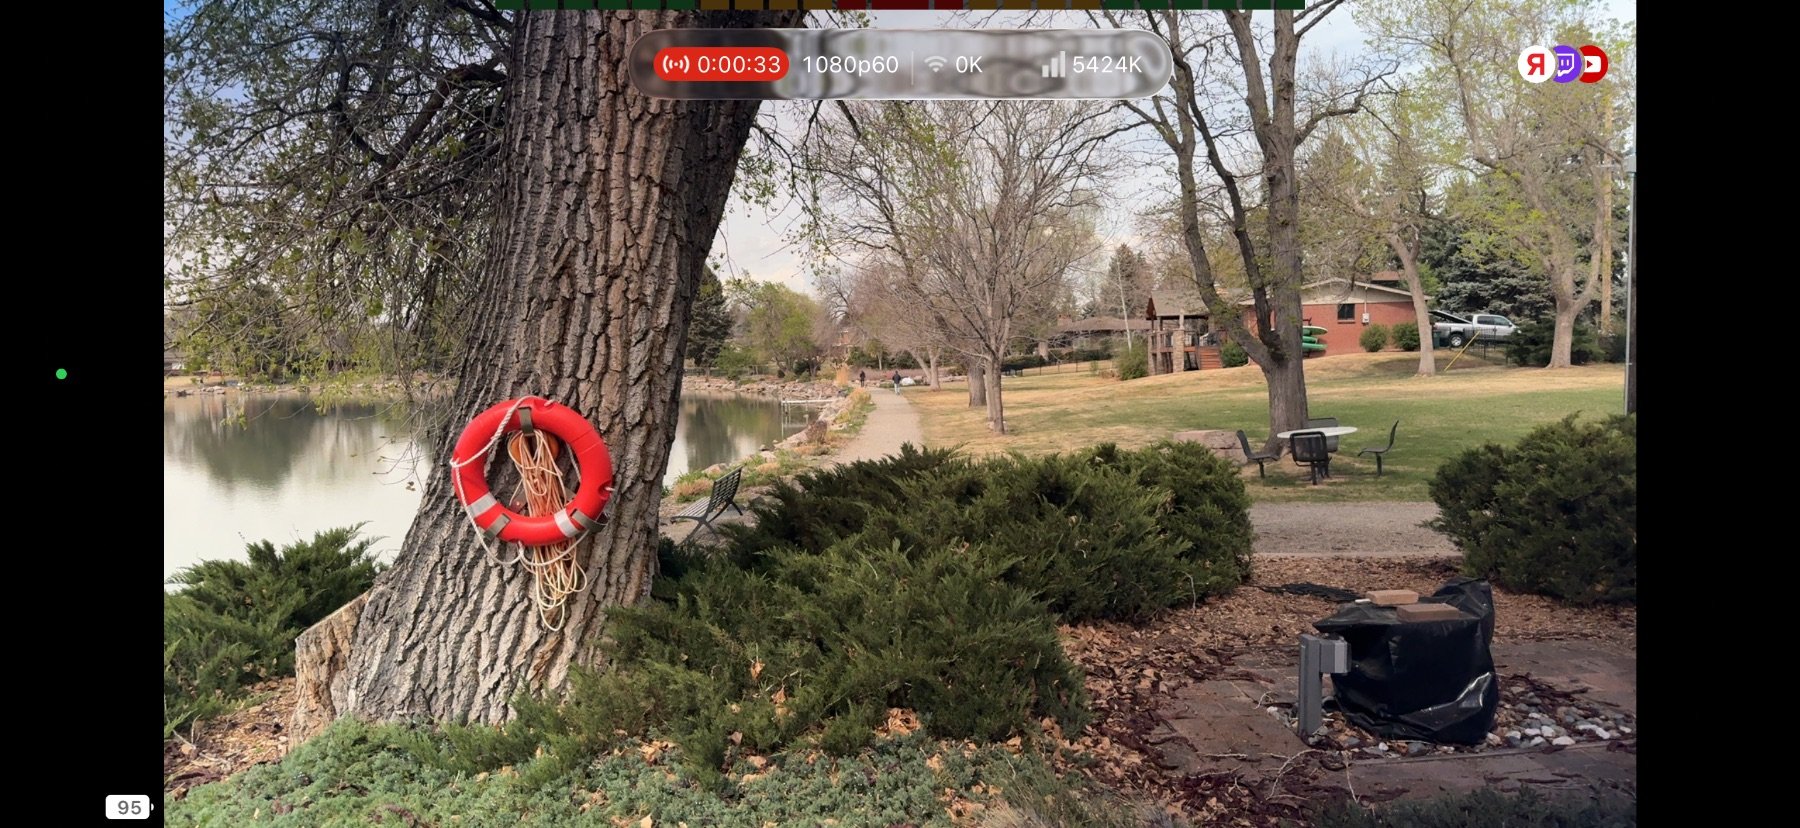
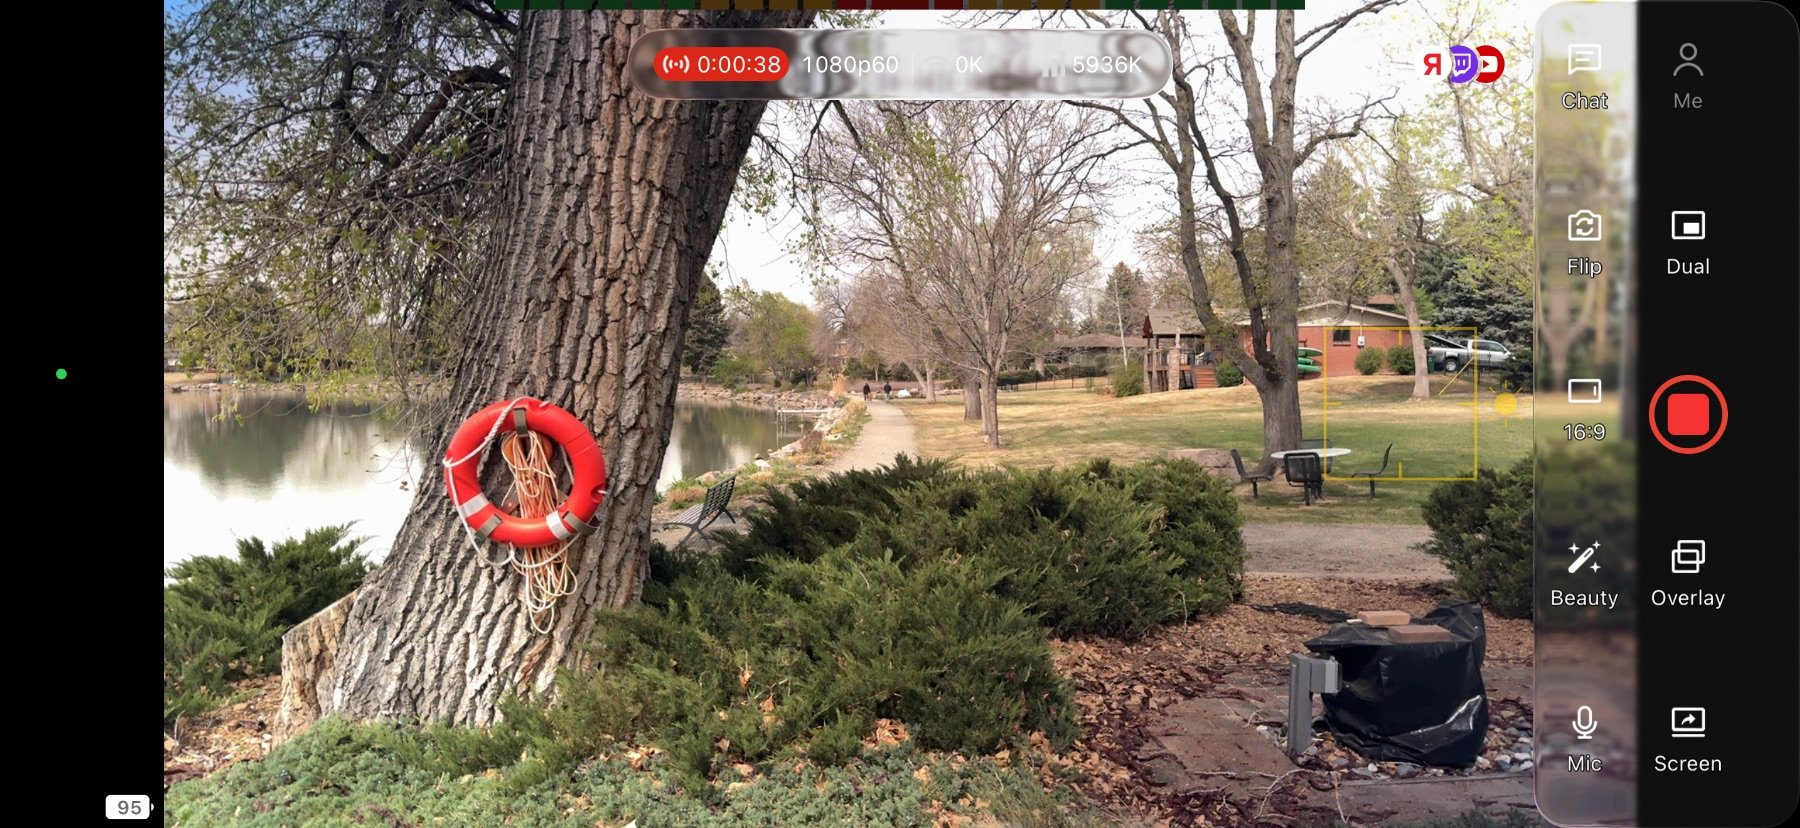
Monitor Live Bitrate
Tap the screen while streaming to show your live stats. This lets you see your bitrate and connection performance in real time.
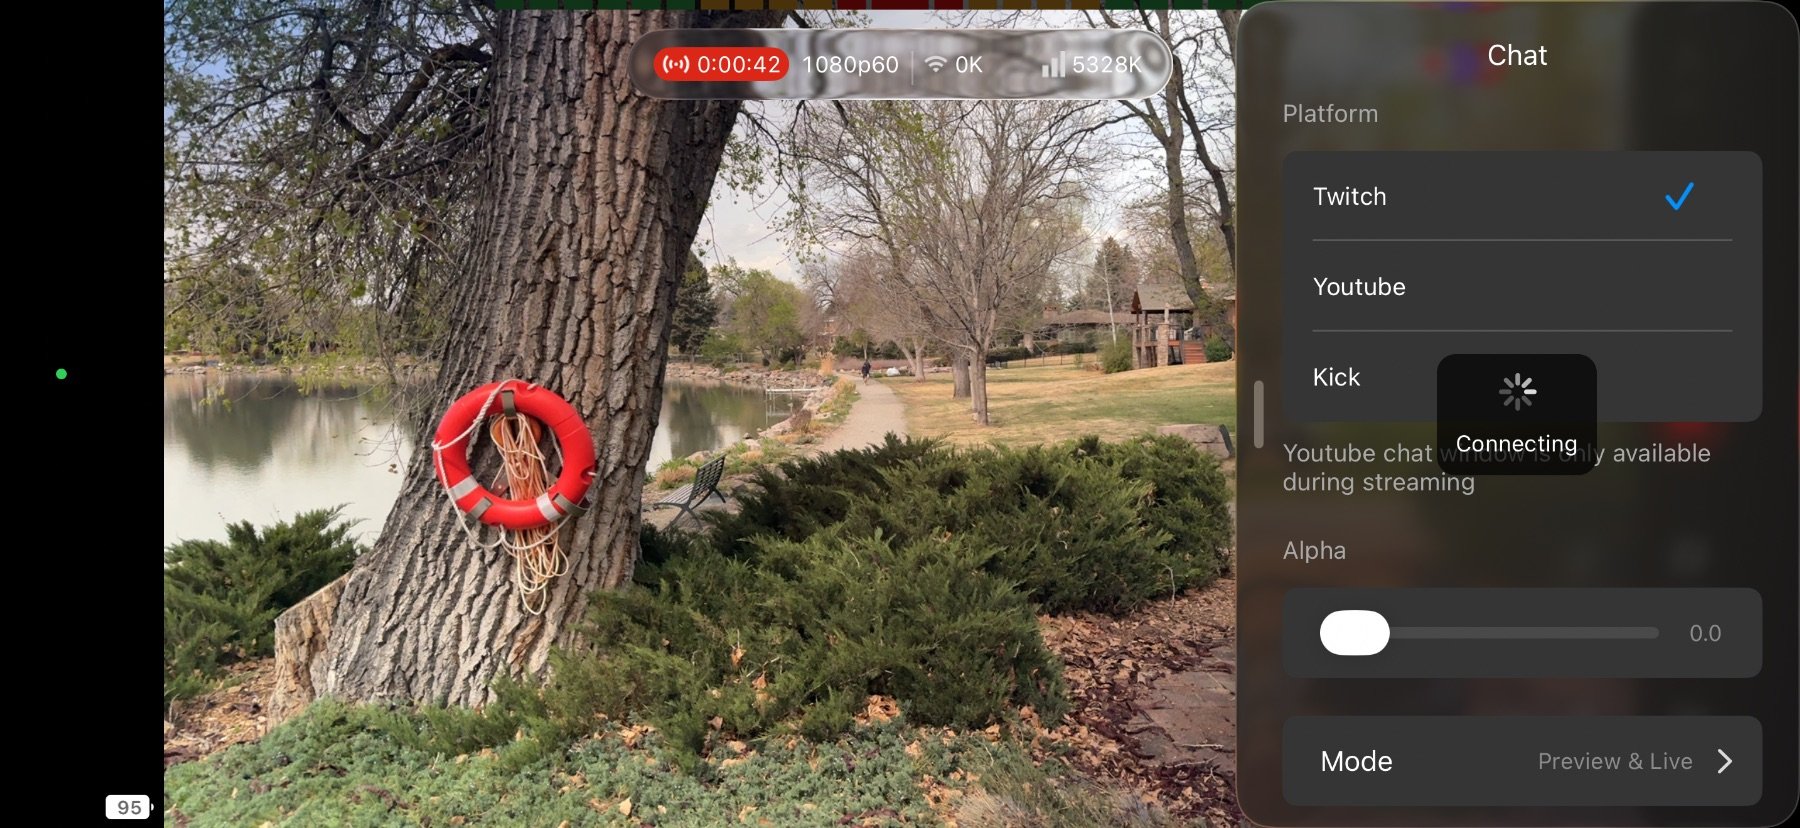
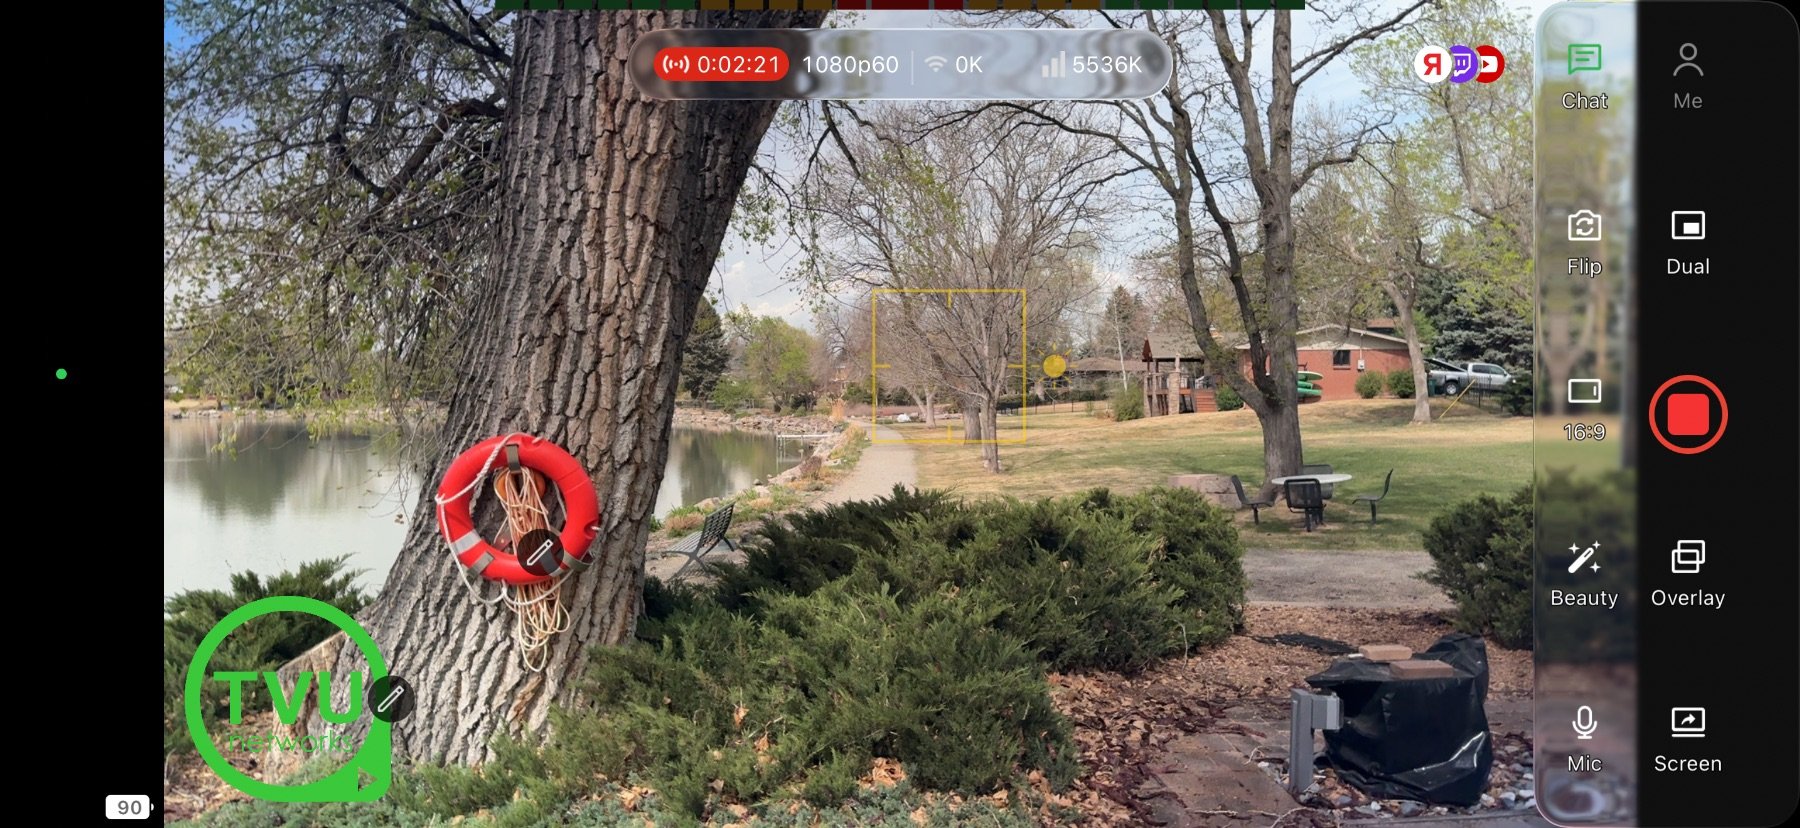
Chat & Overlays
Bring live chat on screen and add overlays to your stream.
Access Chats & Overlays
You can access Chats and Overlays from the bottom or side menu on the home screen.
Add Chat Overlay to Stream
On the bottom menu on the home screen, tap "Chats". Pick a platform to enable the chat, then drag it into position.

External Overlays
Tap "Overlays" to access external overlay options, including Start Screens, Privacy Screens, and HTML and PNG overlays.
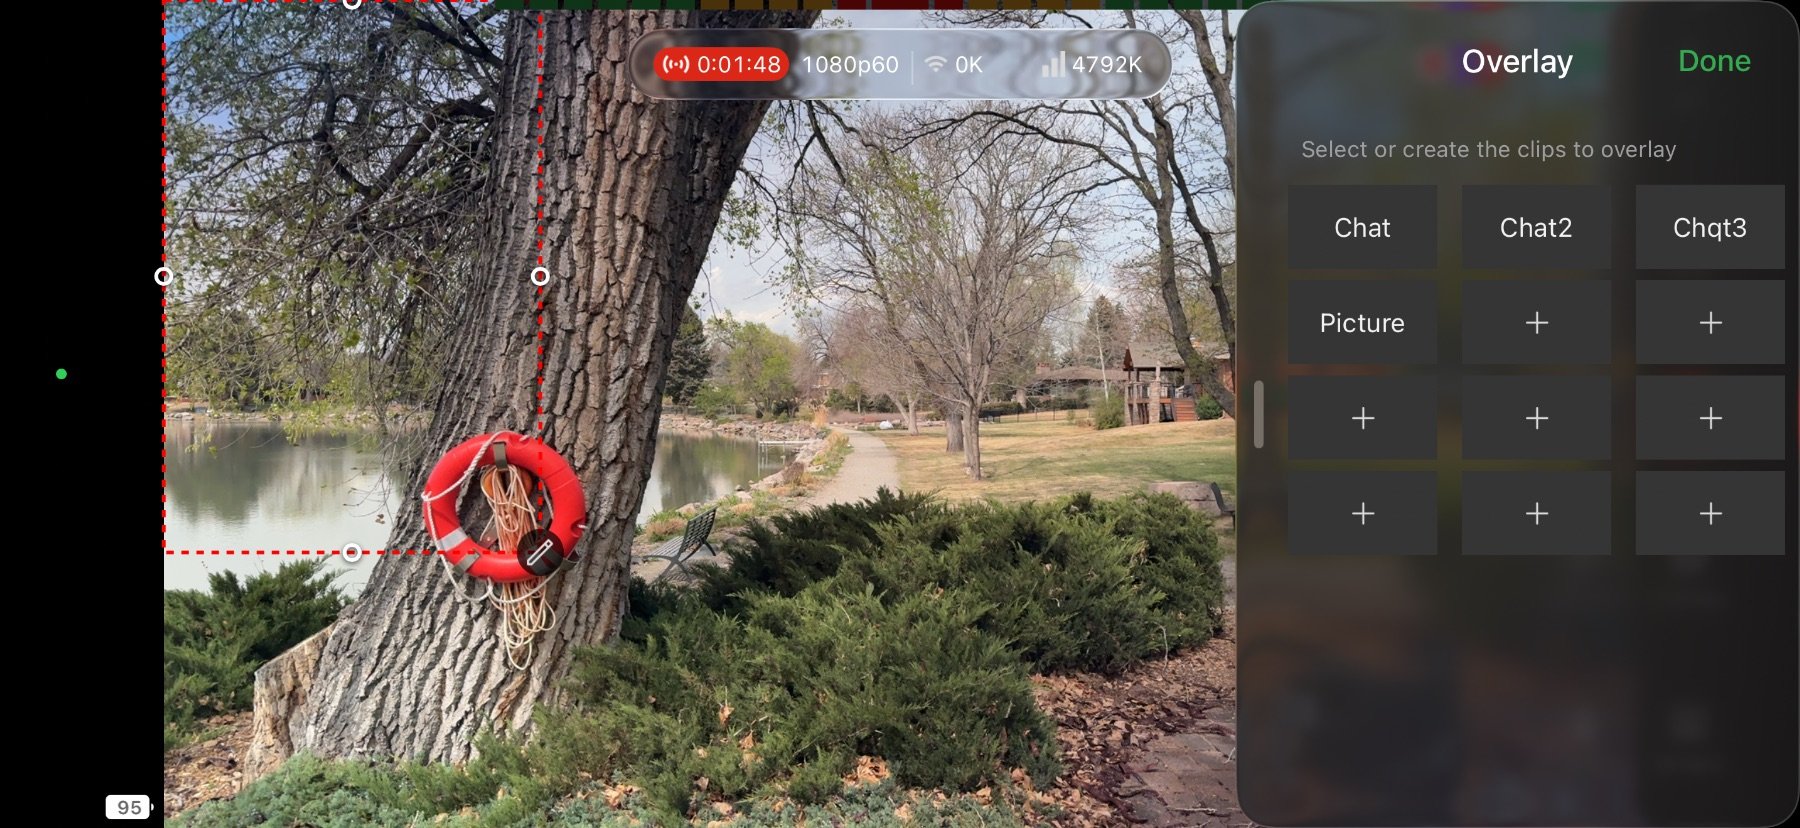
Add HTML Overlay
Add HTML overlays from a URL or upload PNG files with transparency for logos and lower thirds.
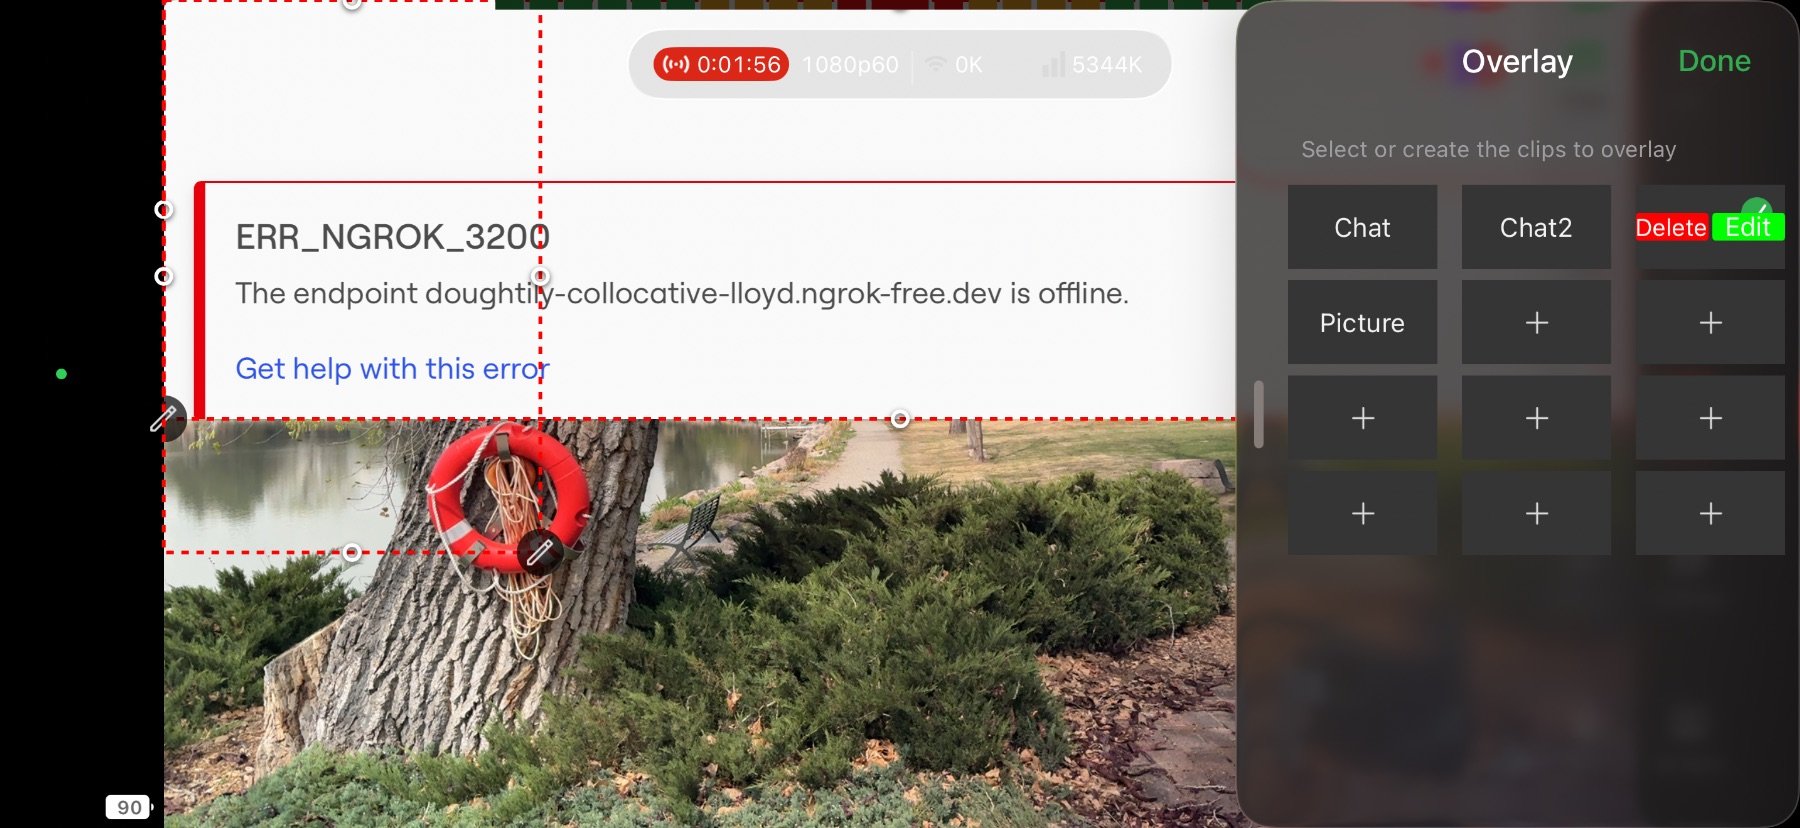
Interact with Overlays
Tap and hold any overlay to interact with it directly on screen: move, resize, or remove it live.
Upload PNG Overlay
Upload PNG files with transparency to add custom graphics, logos, or lower thirds to your stream.

Confirm Overlays
Check your overlay and tap "Done" to finalize your configuration and apply it to the stream.
Dual Camera
Use the front and back cameras together, live.

Open Dual Camera
Tap "Dual" on the bottom or side menu to enable dual camera mode: use both front and back cameras simultaneously.
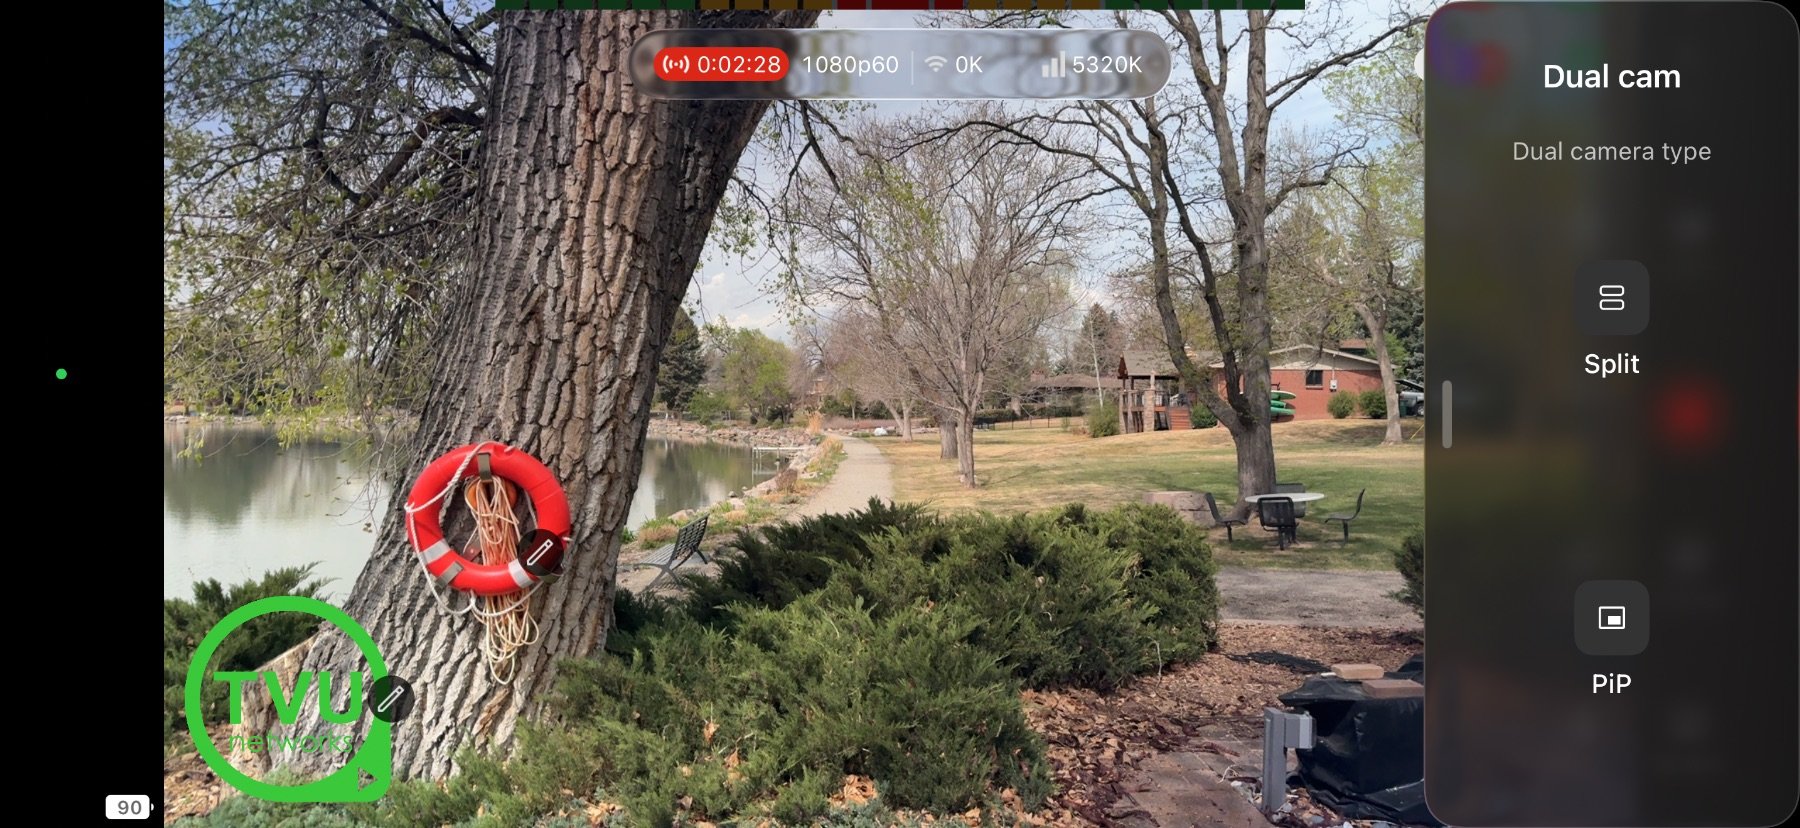
Select PiP or Split Layout
Select between "PiP" (Picture in Picture) or "Split" (Split screen) mode to go live with that dual camera layout.
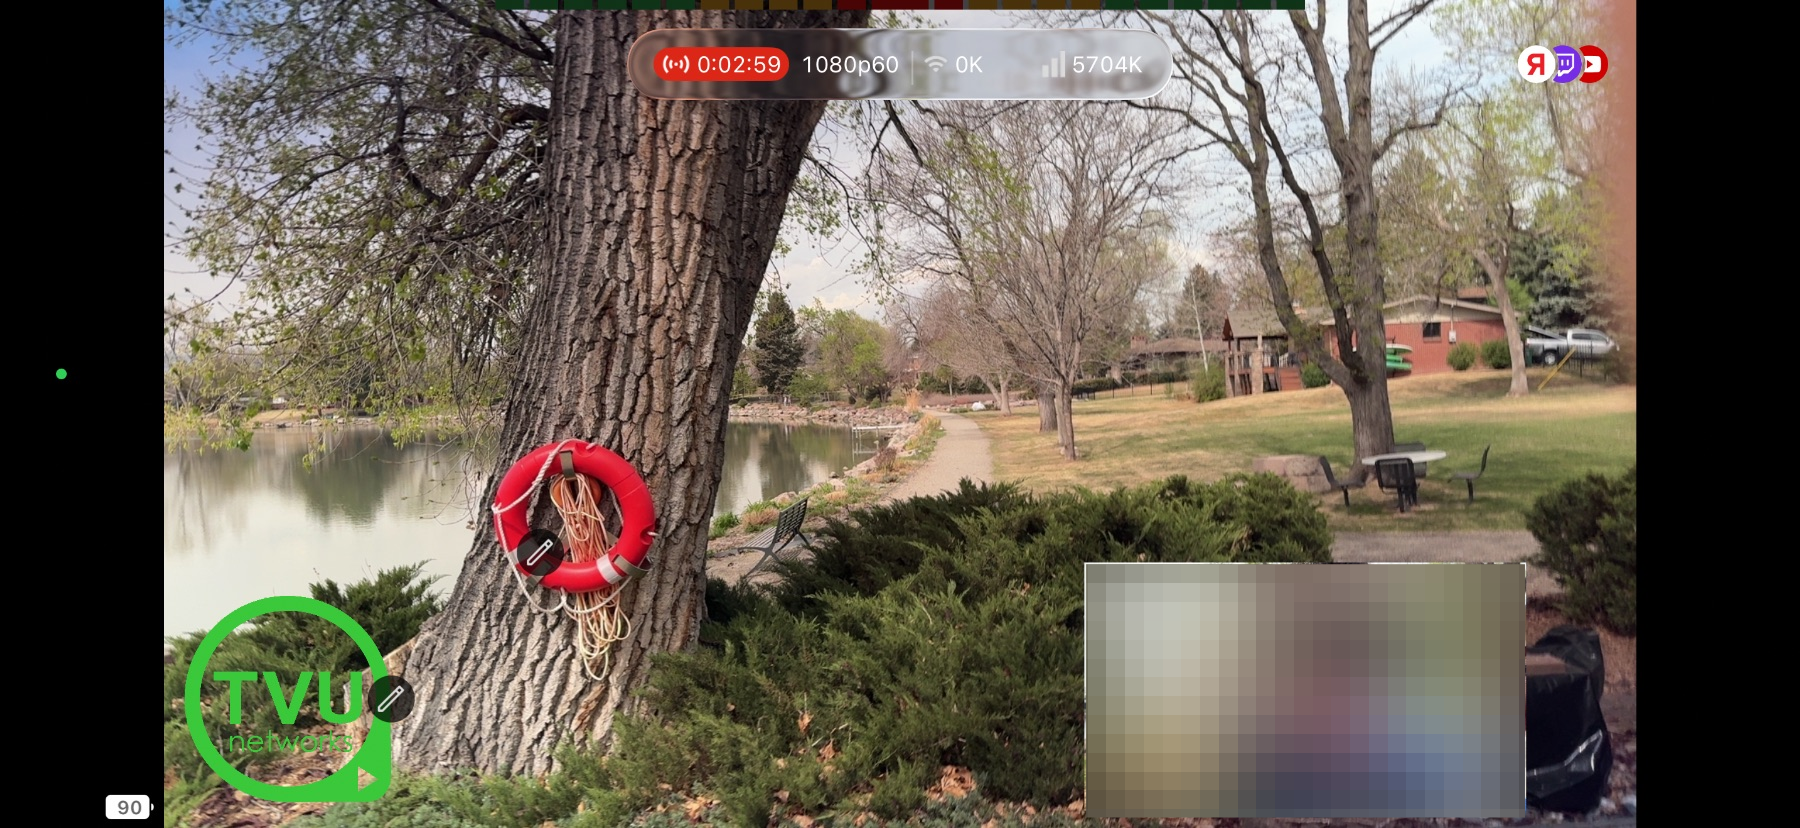
Camera Selection
Move, resize, or flip views with a tap or double-tap.
Beauty Mode
Apply smoothing filters and refine your on-camera look.

Open Beauty Mode
Tap "Beauty" on the bottom or side menu to access beauty mode and apply smoothing filters to your camera feed.
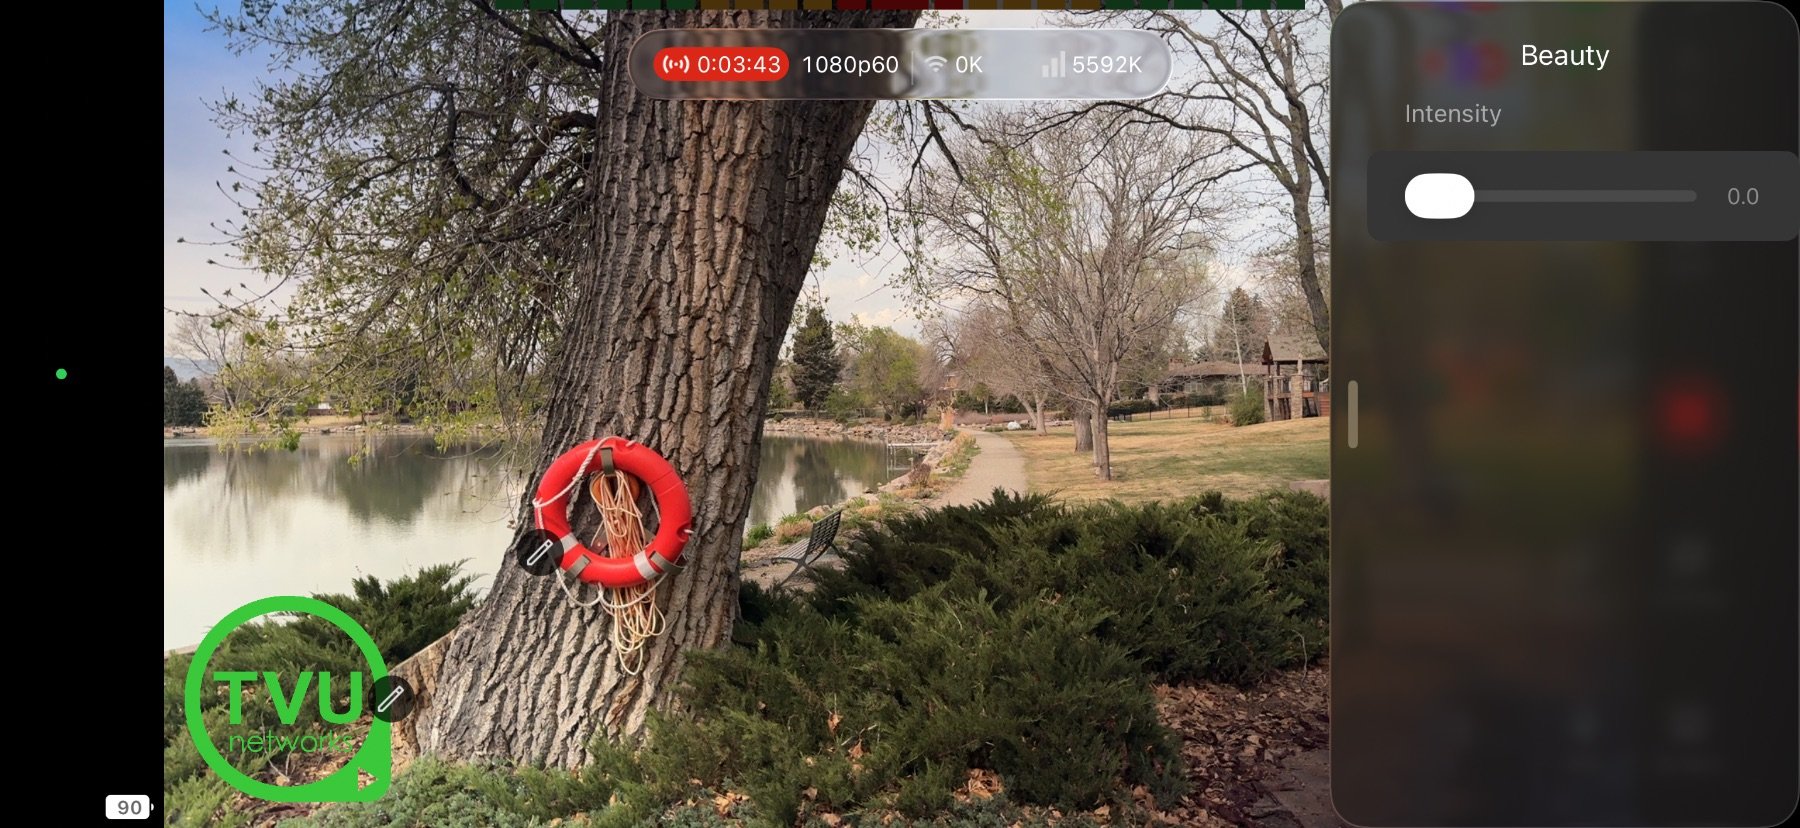
Adjust Beauty Intensity
Tap and drag to adjust the intensity of beauty mode and refine your on-camera look.
Microphone
Open Mic Settings
Tap "Mic" on the bottom or side menu to access microphone settings and controls.
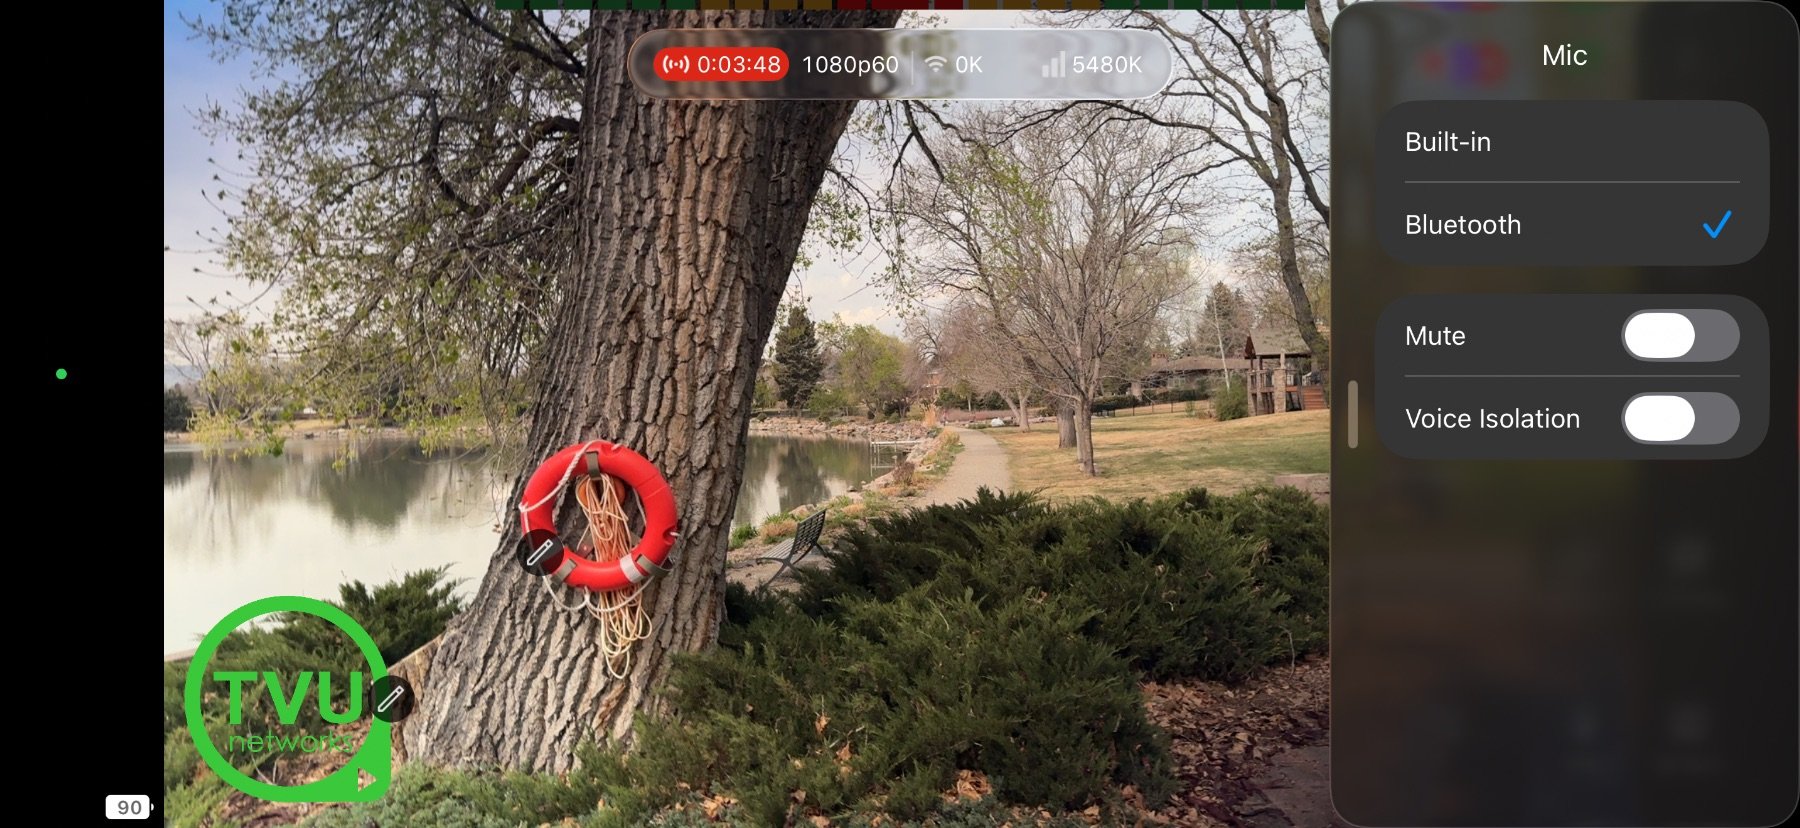
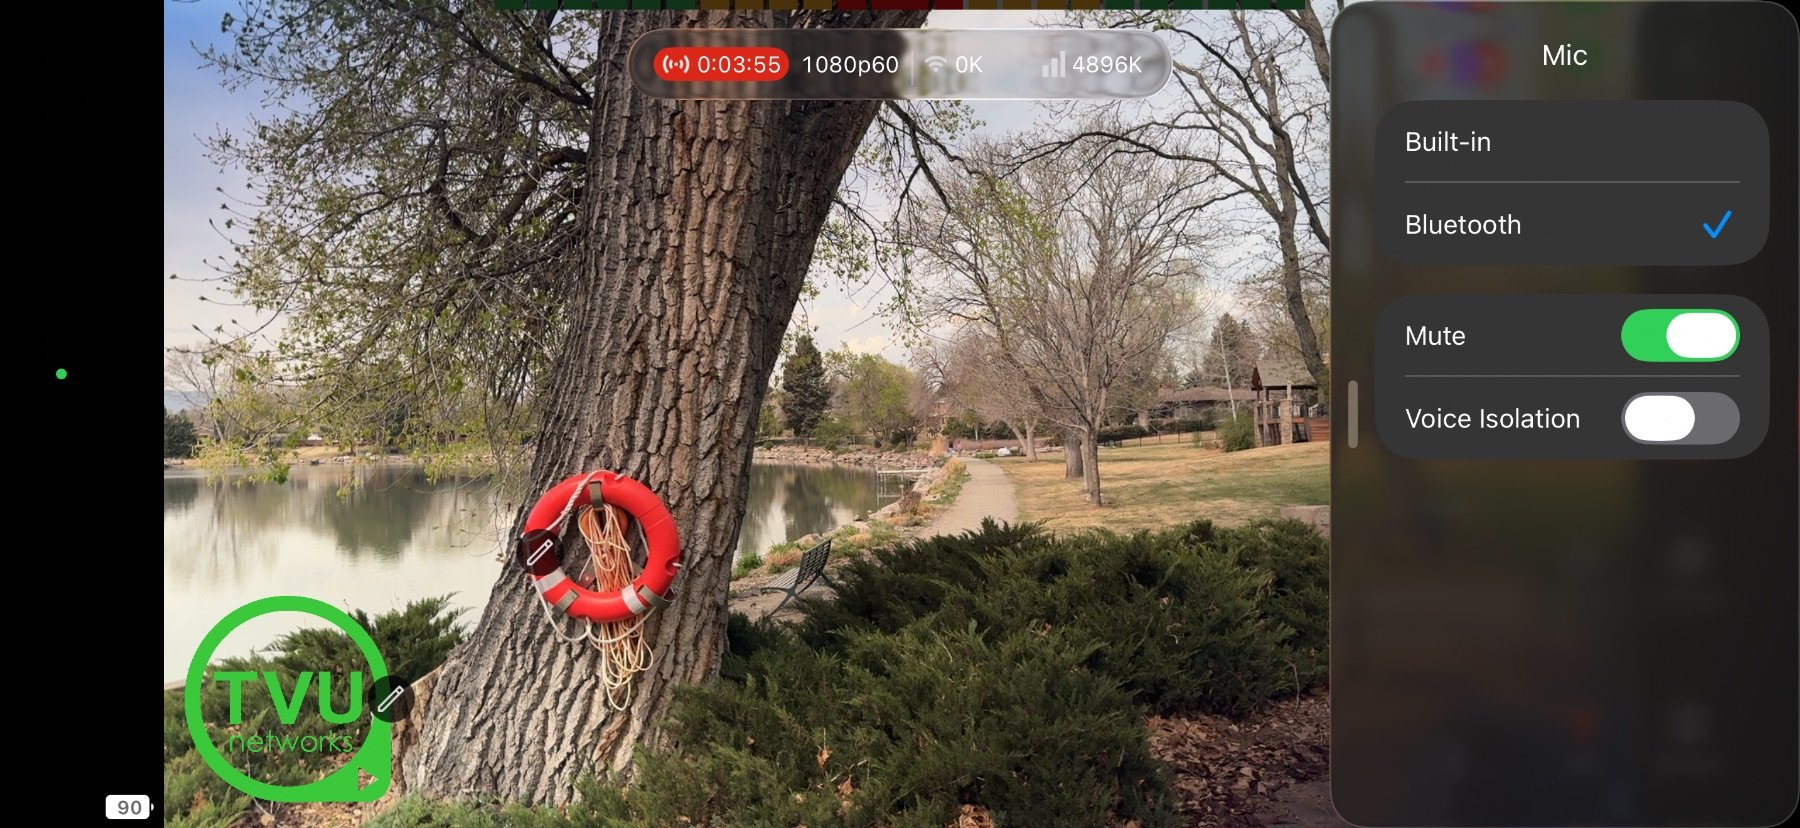
Mute / Unmute
Use the "Mute" toggle to quickly mute or unmute your microphone during a live stream.
Advanced Mic Options
Tap a microphone to switch between input sources.

External Mic Detection
External microphones are automatically detected and selected when connected.
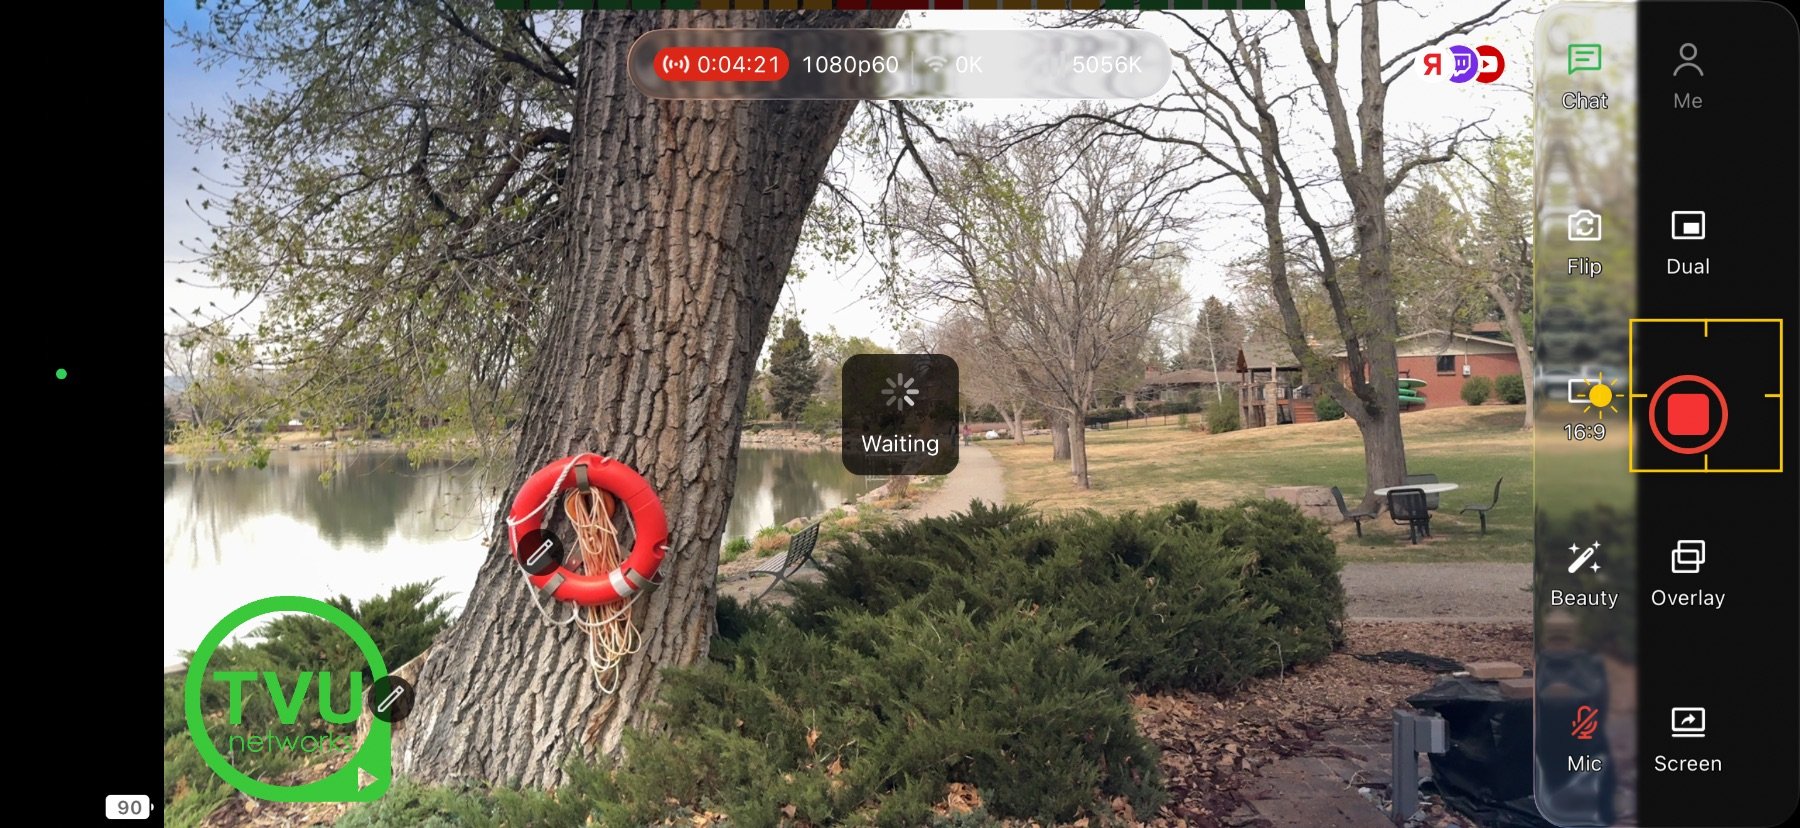
Screen Share
Broadcast everything visible on your device screen.

Open Screen Share
Tap 'Screen' on the bottom or side menu to enable screen sharing: broadcast everything visible on your device.
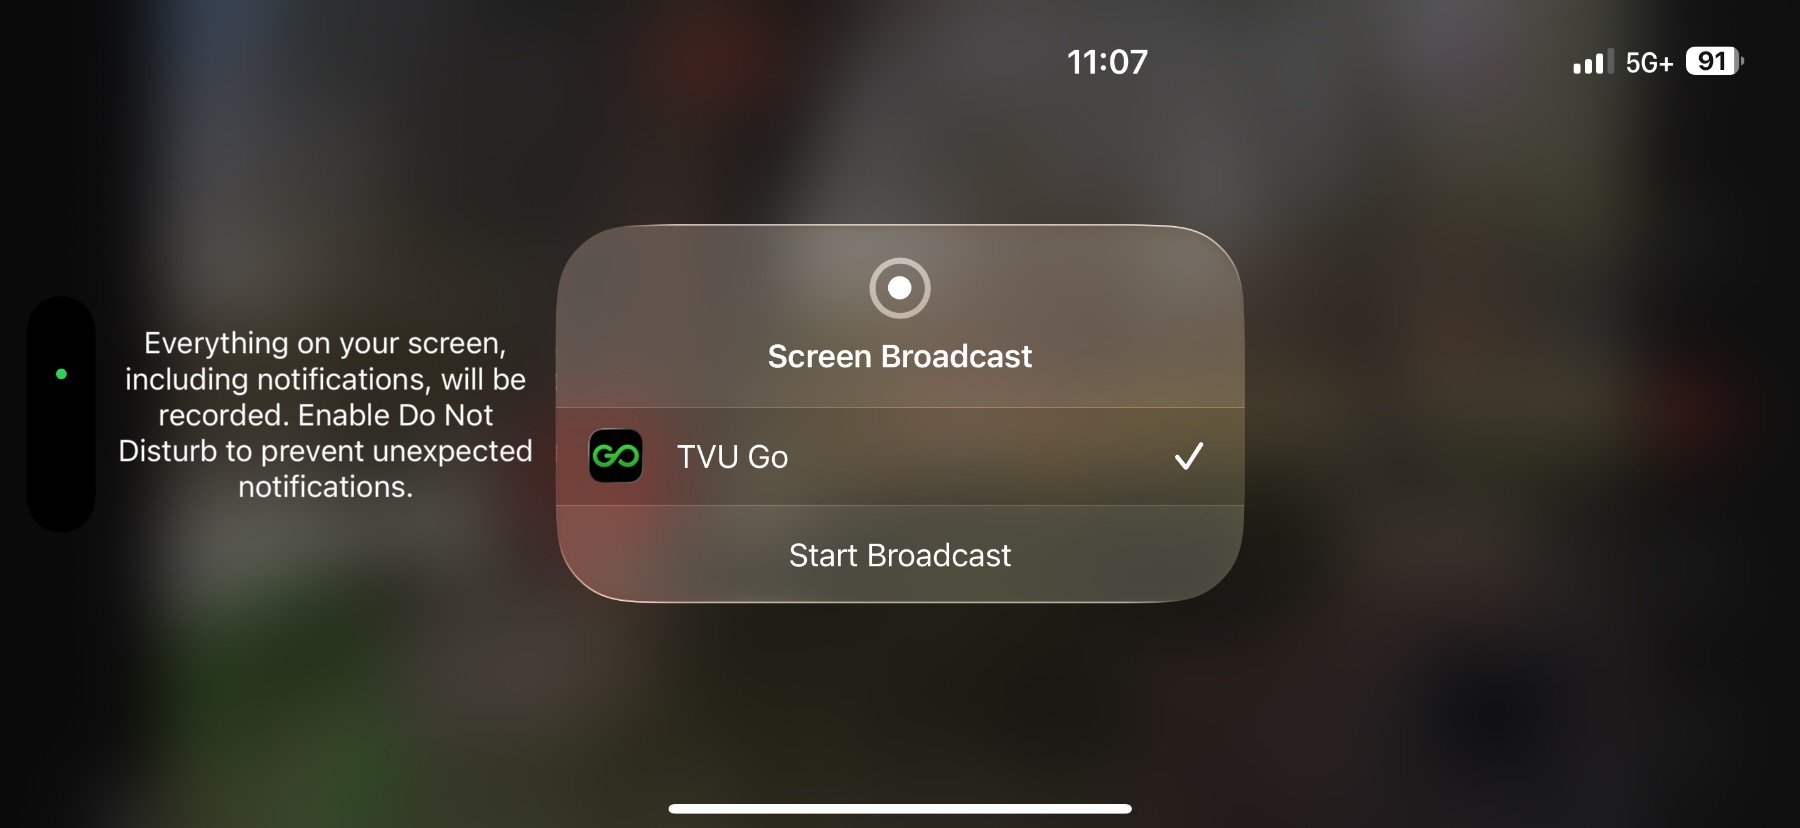
Start Screen Capture
Select and tap 'Start broadcast' to begin screen capture and share your device screen to the stream.
End Stream
Stop Your Stream
Tap the Stop button to end your stream. Wait for the timer to reach zero before closing the app.
Stream Stopped
Your stream has ended successfully.
Account Settings & Sign out
Access Account Settings
Tap 'Me' on the bottom or side menu to access settings. Then tap on your username at the top to access your account details.
Sign Out
Select 'Logout' to confirm signing out of your TVU Go account.